
Beginner videographers looking to start a video studio in order to shoot videos on a shoestring budget find it really hard to bring everything together.
To start off with, they’re often clueless about the number and quality of lights they should invest in. Then there is the question of backgrounds. And I haven’t even gotten into the camera and lens aspect yet.
Things like a good quality external microphone or a light shaper always ends up being an afterthought.
The aim of this article is to clarify some doubts you may have, address some of the buying questions and to set you in the right direction with the right frame of mind. We’ll touch on the primary equipment that you’ll need to get a home studio setup, but won’t go into post-production considerations in this article.
We’ve touched on starting video production equipment before. This is not that. This is about setting up a small video production studio on a budget. Complete with backdrops and things like that, perfect for shooting product shot projects, etc.

Lighting
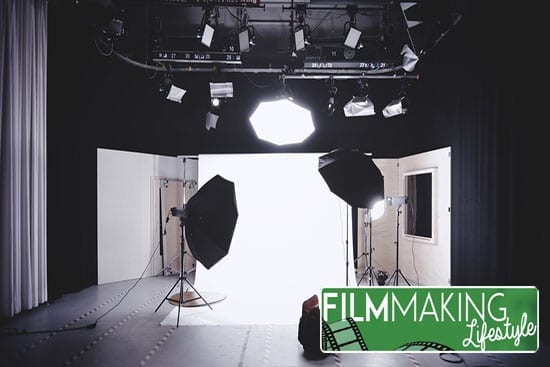
Lighting is the key to any home studio set-up. The more lights you have, the better. And, unlike in the case of still photography where you can get far with inexpensive speed lights, you absolutely need continuous lights if you plan on shooting video indoors.
Buying lights can be an expensive endeavor, as well as a confusing one. You can easily spend upwards of $1000 and still not get what you really need.
Thankfully, you don’t always have to spend thousands of dollars to get what is required. A basic Raya portable studio kit featuring two lights, light stands, clamps and accessories will cost you just about 150 bucks. That’s a brilliant way to get a complete lighting set-up.
As a beginner, just trying to find your feet in the domain of video production, all you need is a basic two light set-up.
Two lights allow you to use one as your key light and you are free to use the other for any number of reasons. For example, you can use one light to work as your key light and another to work as your fill light.
Though one light is the bare minimum and two lights is better, the more lights you have, the more control you have over the quality of light in your video studio.
Three lights give you an incredible advantage, as you now have an extra light to work with. You can set this light up to work as your background light. A background light fires directly towards the background.
A white backdrop for example can appear grey or black depending on its distance from the subject and whether or not a dedicated light is used to light it. Check this video out:

Alternatively, you can use the background light to throw some light back at the subject while placing it directly behind him / her. In the process, you create something known as rim lighting.
Another important thing to consider when buying your lights is to ensure that they fire at or around 5000˚K. That is the temperature of daylight. You can’t go worn with daylight balanced light source. Anything that is shot in a constant daylight balanced light can be tweaked or color graded later on quite easily.
For more detailed lighting, check this video out:
Light Shapers
‘Light shapers’ are the tools that allow you to change the quality of the light you use. These include diffusers, flags, snoots, barn doors and so on.
Even umbrellas (from standard photography) can be used as light shapers:
Video Production with Alex Buono” width=”500″ height=”281″ src=”https://www.youtube.com/embed/m14GpC4en8E?feature=oembed” frameborder=”0″ allow=”accelerometer; autoplay; clipboard-write; encrypted-media; gyroscope; picture-in-picture” allowfullscreen>
My favorite light shaper is the softbox. The softbox is an extremely good solution when you’re on a budget. Its role is pretty much given away by its name: it softens the quality of light.
Whether you are shooting indoors or outdoors, still or video, softboxes are incredibly useful.
Without a softbox, your light is essentially a harsh source likely to produce lots of shadows. As a result, you’re likely to get a lot of contrast.
With a softbox, the light intensity is reduced. It’s ideal for shooting interviews, for example.
Camera
Video shooting requires a camera that you can focus without having to keep your eyes at all times on the viewfinder.
If you’re on a budget, professional video cameras are out of the question. They’re extremely expensive. Smaller APS-C DSLRs like Canon’s EOS 80D have excellent live-view abilities. Plus, these cameras come with a vari-angle LCD screen with touchscreen capabilities.
A vari-angle screen allows you to explore extremely tight angles such as when shooting from the ground up or when shooting around a corner.
Another thing that works in favor of Canon’s latest APS-C systems is that these cameras come with dual-pixel CMOS AF technology. Dual-pixel CMOS AF is designed for shooting better quality videos.
Live-view traditionally uses the slower contrast detection auto-focusing mechanism. But Canon’s dual-pixel CMOS AF mechanism uses sensor-based dual-pixel architecture that works very much like the auto-focusing mechanism in rangefinder cameras.
This system, thus, improves auto-focusing efficiency when shooting videos.
Why is the dual-pixel AF technology is so helpful? Well, when you shoot videos with your DSLR, the camera’s mirror is locked in an up position. This prevents the phase detection sensors located at the bottom of the camera to obtain any light in order to focus.
Therefore, the camera switches to contrast detection auto-focusing. Now, this is a much slower focusing technology. This tend to hamper the quality of auto-focusing performance.
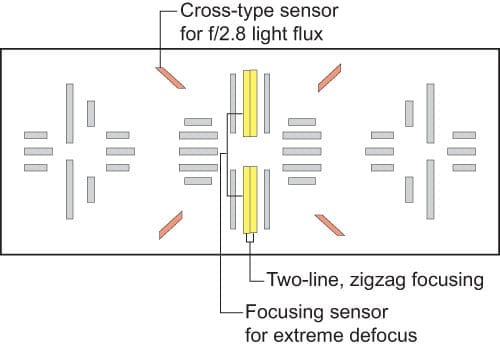
To counter this problem of slow focusing, Canon has come up with the dual pixel technology. Dual pixel technology is about splitting the individual pixels into two. Each side receives light from one side of the lens only.
These images are compared and focusing is locked. That means the individual pixels work as phase detection sensors. This technology helps video shooters and those who mainly shoot with the LCD screen rather than the viewfinder.
Here’s a diagram (courtesy of The-Digital-Picture) that explains AF:

Additionally, this technology is paired with the new STM lenses that Canon has developed. These lenses have a smoother autofocusing performance, unlike the jittery (and at times abrupt) performance of ultra-sonic motors in older lenses.
Another parameter to consider are the dedicated video shooting features that are available on modern DSLR cameras.
These include focus peaking, manual exposure adjustment, option to use external mic and of course zebra to indicate blown out highlights.
Entry level cameras, however, will not have many of these features.
If you’re looking to raise the budget a little (and maybe consider hiring for certain jobs), I find shooting lots of projects with the Canon C100 a dream.
Lenses

The lens is an aspect of your video arsenal which assumes critical importance can cannot be skipped over.
Look for something which has a fast, wide aperture. If you plan to buy extra lenses later, make sure that all of them give the same widest aperture possible.
This will make sure that if you change lenses between scenes, you can maintain the same visual impact and there is no visual jerk from scene to scene when you change lenses.
External Mic
Most beginner videographers tend to ignore this. Without great quality sound your videos are just moving pictures.
Sure, your DSLR can record sound, but the clarity will be nowhere near the sound quality you can get using an external mic.
There are several good quality external mics available in the market. You don’t have to splurge too much. Just make sure to get something that is compatible with your camera.
Also, ensure that your external mic is a wireless one. Wireless microphones allow you the advantage to shoot further away from the subject and yet be able to record crisp quality sound at all times.
These microphones allow you the option to shoot from a long way away from your subject. Obviously not that necessary when we’re talking home studio setups like this. But worth a mention when considering other projects.
For example, if two people are sitting at a fair distance from the camera you can frame from a distance and yet be able to record what they are saying via the wireless mic.
You may have seen Hollywood movies where you can easily hear two people talking to each other while standing far away from the camera. This is how it’s done.
A decent wireless microphone will give you a range of 100’ to about 300’ (with a clear line of sight), and set you back by about $140.
Backdrop
When shooting in your home studio, you don’t want everything filmed in front of that old brick wall with the strange antiques on it.
You’ll need some really interesting backdrops.
A good rule of thumb is a minimum of four backdrops. One is pure white, the other is pure black. Then you need a middle-gray backdrop and finally a green backdrop that would work as your green screen.
A solid grey backdrop alone can be used creatively to work as a white and a black one. This, of course, depends on how you light your background and expose for it.
There are plenty of good places to find a good backdrop. Photopie Backdrops are a great place to find excellent backdrops for your video shoots. They offer a range of solid and scenic backdrops for your home studio.
External Screen
An external screen is a must have for the purpose of checking the scene being shot.
The built-in small screen on a DSLR is tiny to say the least. Plus, it most likely will have no built-in features that professional external screens come with.
For example, focus peaking is a feature that most pro external screens have. This allows precise manual focusing which is very difficult to achieve when shooting with the built-in LCD screen. Plus, with an external screen you can sit with a client and watch the footage as it’s being filmed.
Conclusion — What Do You Want Your Video Studio To Be?
I hope you’ve found this look at setting up a video production home studio helpful. Like I mentioned at the beginning, this isn’t meant to be a guide to starter video production equipment. Instead, this is designed to help you specifically select gear (for buying or rental) to build your own video studio.
Have you got a home studio? How did you set it up? As always, we welcome questions, thoughts and musings in the comments section below.
great research thank you!
Glad it helped.
Thanks,
Matt
Thanks for the article, it’s very insightful and very much appreciated by this hopeful film maker! Thanks again.
Thanks for the comment, Ben! Appreciate it.
Cheers,
Matt
Thanks for the comment, Ben! Appreciate it.
Great tips for setting up a video studio on a budget! I’m definitely going to try out a few of these ideas!
Appreciate it, Mitchell.
Great tips for setting up a video studio on a budget! I’m definitely going to try out a few of these ideas!
Thanks, Mitchell.