
One of the most important settings on your camera is ISO, but it isn’t part of exposure. In this blog post, we’ll take a look at what ISO does and how you can use it to get better photos.
First off, let’s go over what ISO is.
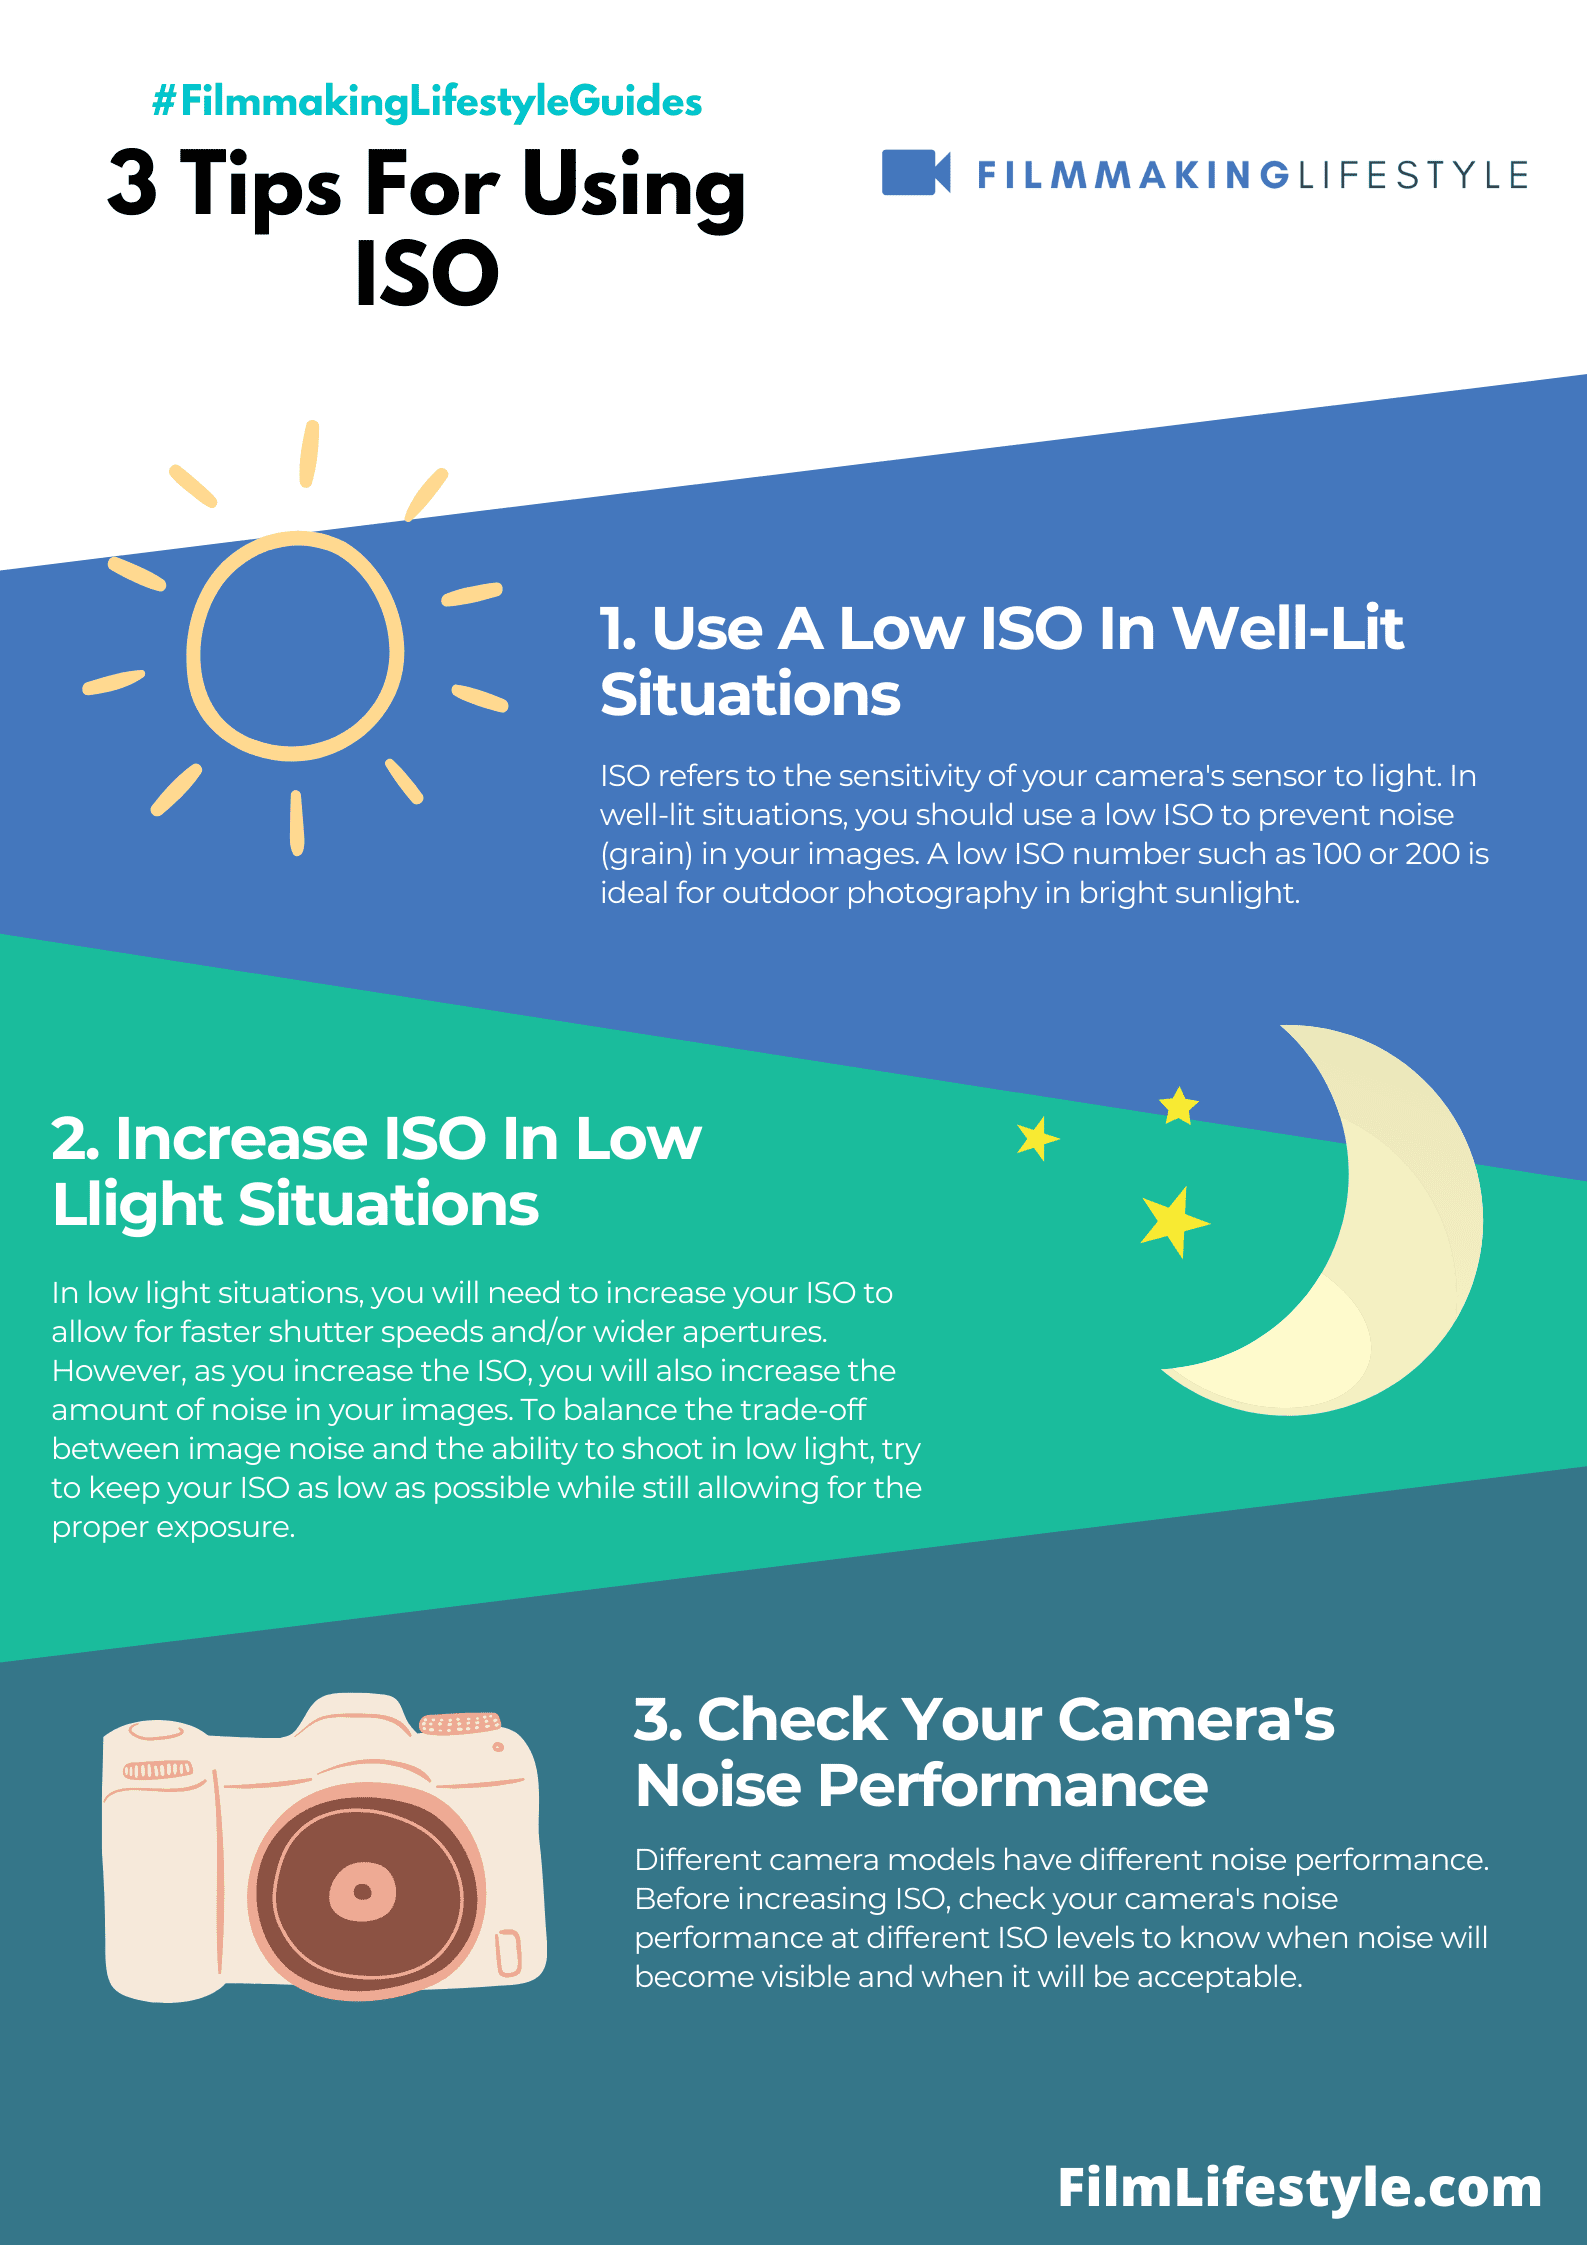
It stands for International Organization for Standardization, which means that there are different levels of sensitivity to light – or sensitivities- in film and digital cameras.
WHAT IS ISO
What Is ISO
ISO is a set of standards for exposure, light sensitivity, and film speed.
The ISO standard was originally established in 1934 by the International Organization for Standardization (ISO).
When we talk about ISO, we’re diving into a world of standards that ensures products and services are safe, reliable, and of good quality.
It’s the secret ingredient behind many of the things we take for granted in our daily lives.
From the crispness of a photograph to the safety of the toys our kids play with, ISO touches an incredibly diverse range of industries.
In this article, we’ll unravel the mystery of ISO, explaining what it stands for and why it’s so crucial in our interconnected world.
We’ll explore its impact on businesses and consumers alike, ensuring you’re equipped with the knowledge to understand how ISO standards influence almost everything around us.
What Is Iso?
In the world of filmmaking, understanding ISO is pivotal to mastering the art of video production.
ISO refers to the International Organization for Standardization, an independent, non-governmental international organization.
They develop and publish a vast array of global standards covering almost every industry, including the complex field of film and video production.
These standards are a guiding light for quality and consistency in our productions.

In essence, without ISO, we’d struggle to maintain the high standards that guarantee our videos meet international expectations.
The importance of ISO in filmmaking can’t be understated – it ensures that our cameras, lighting equipment, and post-production processes adhere to benchmarks that audiences and clients trust.
ISO Standards Significantly Impact Several Aspects of the Filmmaking Process:
- Camera and equipment manufacturing,
- Post-production workflows,
- Distribution and archival standards.
By sticking to ISO guidelines, we make sure that our equipment is reliable and that our films have the longevity and compatibility needed in a digitally-driven market.
The ISO seal of approval also opens up doors to global markets, making our films more accessible and marketable across various cultures and countries.
It’s not just about conformity; it’s about raising the bar.
When we align our creative process with ISO standards, we’re not only ensuring a smoother production cycle but also enhancing our credibility within the industry.
In a sector where quality speaks volumes, being ISO-compliant can set us apart from the competition.
Importance Of Iso Standards
When diving into the realm of filmmaking, ISO standards serve as the beacon that ensures we adhere to high benchmarks and industry norms.

These standards are not just checkboxes on a list but are vital in every stage of production – from pre-visualization to the final cut.
They provide us a common language that bridges gaps between disparate teams and technologies across the globe.
ISO standards in filmmaking are significant for several reasons:
- They establish quality and safety benchmarks for equipment and processes,
- They enable seamless collaboration between international partners,
- They ensure consistency and compatibility across various platforms and media formats.
While we strive for artistic expression and storytelling in our filmmaking endeavors, these standards also guide us through technical intricacies.
Cameras, lighting equipment, and editing software, all come stamped with assurance thanks to ISO.
They confirm that our tools meet rigorous requirements, significantly lowering the risk of production errors and equipment failure.
In distribution, ISO standards support the credibility and reliability that distributors and exhibitors demand.
When our content reaches the audience, it’s not just the story that speaks but also the quality assurance that comes with ISO compliance.
By aligning with these standards, we gain a competitive advantage in a market that values consistency and reliability just as much as creativity.
ISO standards extend their influence to the preservation of our work as well.
The archival standards ensure that masterpieces like Citizen Kane or The Godfather remain accessible for future generations.
The digital age demands robust methods to protect films from being lost to time or technology changes, and ISO lays the groundwork to make this possible.
We also embrace ISO standards because they represent our commitment to excellence and a dedication to our craft that goes beyond the screen.
They are the unsung heroes in our quest to bring powerful narratives to life, resonating with audiences and industry peers alike.

Iso In Daily Life
In our pursuit of cinematic excellence, we often overlook the everyday role of ISO.
It’s not just about setting the stage for Oscar-winning films or chart-topping documentaries.
ISO standards touch every part of our day-to-day life, often without us even realizing their presence.
From the coffee machines that jumpstart our mornings to the cars we drive, ISO is ever-present.
Each device operates reliably because of the quality assurance ISO guarantees.
We trust these items with our safety and comfort, thanks to their compliance with ISO norms.
Beyond personal use items, consider the buildings we frequent.
Offices, cinemas, and even the studios where magic happens – their construction and safety features are all underpinned by ISO standards.
These invisible guidelines ensure we’re working and enjoying our leisure in spaces that are secure and well-regulated.
When we embark on our weekly grocery shopping, even our choices are influenced by ISO.
Products with ISO certification tell us they’ve been through rigorous testing and meet international standards for quality and safety.
We make informed decisions, selecting food and household products that are trustworthy and reliable.
And let’s not forget the digital realm –
- software development and data security,
- cloud services and customer relationship management,
- social media platforms where we share our work.
They all lean heavily on ISO to provide a consistent, secure experience for users and creators alike.
So while we may dedicate our lives to the craft of filmmaking, remembering the broader implications of ISO keeps us grounded and appreciative of the standards that shape our world, both on and off the set.
Iso And The Impact On Industries
When we think about the versatility and widespread adoption of ISO standards, it’s evident that industries far and wide have been profoundly impacted.
In healthcare, ISO certifications are critical to ensuring medical devices meet stringent safety and quality requirements.
For the automotive industry – innovation, safety, and environmental impact rest heavily on compliance with numerous ISO standards.
They guide everything from quality management to new technologies integrated into modern vehicles.
Manufacturers rely on ISO to streamline production and to uniformly measure product quality.

This adaptability across industries means whether it’s a smartphone or a set of power tools, consumers can trust the value and reliability of ISO-certified products.
In the realm of entertainment, specifically filmmaking, ISO plays a subtle yet pivotal role.
Visual and audio standards allow for a level of consistency in production and post-production that audiences often take for granted.

We encompass the power of ISO standards across various service sectors – – IT service management adheres to ISO/IEC 20000
- Customer service quality is often benchmarked against ISO 18295.
The tech industry has leapt forward with the guidance of ISO standards in cybersecurity and data protection.
These efforts resonate with our increasing reliance on digital platforms for personal and business use.
For environmental management, ISO 14001 has become a cornerstone, enabling companies to minimize their ecological footprint while maintaining operational efficiency.
This reflects a broader commitment to sustainability within the corporate sector.
The influence of ISO extends to education and training sectors as well.
It ensures that the programs offered meet the global benchmarks for educational excellence and relevance in an ever-evolving workforce landscape.
Iso For Businesses And Consumers
ISO standards play a pivotal role in bridging the gap between businesses and consumers by establishing a common language.
These standards ensure that products and services meet consistent levels of quality and safety, which is
For businesses, adhering to ISO standards can often be the key to unlocking international markets.
These certifications signal to potential clients that our products are reliable and meet international benchmarks, So fostering a competitive edge.
Consumers benefit greatly from ISO standards.
The consistent quality checks mean less worry about the safety of products, be it electronics, toys, or food items.
With ISO standards in the mix, there’s a shared expectation of product reliability and effectiveness.
Here’s how ISO shapes the consumer landscape:
- Guarantees product safety and quality,
- Improves product information clarity,
- Enhances consumer satisfaction and trust.
And for businesses:
- Streamlines production processes,
- Reduces costs by minimizing waste and errors,
- Opens doors to new markets and clients.
In the film industry, for instance, ISO standards ensure that specialized equipment like cameras and lighting systems align with industry benchmarks, which is essential for delivering high-quality productions like The Grand Budapest Hotel or Guardians of the Galaxy.
In the IT sector, ISO standards like ISO/IEC 27001 are critical to maintaining cybersecurity.
They not only protect business data but also safeguard consumer information, So supporting mutual trust and reliability in digital services.
Overall, ISO’s reach extends far beyond simple certification – they’re a cornerstone of modern commerce and consumer confidence, empowering businesses to perform at the top of their game while ensuring consumer interests are well-protected.
What Is Iso – Wrap Up
We’ve seen how ISO standards are integral to fostering trust and efficiency across various sectors.
By embracing these guidelines, businesses not only enhance their competitive edge but also contribute to a safer, more reliable market for everyone.


It’s clear that ISO’s role in harmonizing global practices is invaluable, leading to innovation and growth.
As consumers, we can rest assured that ISO-certified products and services meet rigorous benchmarks, making our lives both easier and safer.
Let’s continue to support and recognize the importance of ISO standards in our ever-evolving world.
Frequently Asked Questions
What Is The Importance Of Iso Certifications In Various Industries?
ISO certifications are vital as they ensure consistent quality and safety levels across industries like healthcare, automotive, and IT.
They establish a common language between businesses and consumers, allowing for global market access and signifying reliability.
How Do Iso Standards Benefit Businesses?
ISO standards benefit businesses by streamlining production processes, reducing costs, and facilitating entry into new markets.
Adherence to these standards also signals to potential clients that a company is reliable and committed to quality.
What Advantages Do Consumers Have From Iso Standards?
Consumers benefit from ISO standards by having assurance about the safety and quality of the products and services they use.
This reduces worries and builds trust in the offerings from businesses.
Why Are Iso Standards Crucial In The Film And It Industries?
In the film industry, ISO standards ensure equipment meets industry benchmarks, critical for production quality.
In the IT industry, they play a significant role in maintaining cybersecurity and safeguarding business and consumer information.
How Do Iso Standards Contribute To Consumer Confidence?
ISO standards contribute to consumer confidence by ensuring that products and services meet international safety and quality benchmarks.
Knowing that a business adheres to these standards can ease consumer concerns and enhance trust.
Can Adhering To Iso Standards Unlock International Markets For Businesses?
Yes, adhering to ISO standards can help unlock international markets for businesses as they often are a prerequisite for entering global supply chains and being competitive in foreign markets.
Do Iso Standards Impact The Cost Of Production For Businesses?
ISO standards can impact production costs by making processes more efficient, helping to reduce waste, and potentially lowering the costs of production over time.
