
Double exposure is a technique in which the same film frame or digital image contains two exposures, usually superimposed on one another.
This can be done intentionally by exposing the raw negative twice (or more) to create an “artifact” of sorts, or accidentally when there’s not much light and/or a slow shutter speed, such as with night photography.
The best way to do this is with long exposures in low-light conditions so that you have time for multiple images to register on top of one another without blurring!
It was originally done by manually exposing one negative while rewinding another, and then developing both together into one sheet of film.
DOUBLE EXPOSURE
What Is Double Exposure?
Double exposure is a photographic technique that overlays two separate exposures to create one final image.
This effect is achieved by taking the negative of the first photograph and placing it into the Camera Obscura while simultaneously exposing the second picture through it.
The history of double exposure dates back to 1851 when William Henry Fox Talbot published his book “The Pencil of Nature” which included an example of this technique.
Double-exposures were used extensively in early 20th-century film photography as well as in commercial work such as catalogs and advertisements.
Double exposure is an artistic technique that layers two distinct images to create a single, evocative piece.
It’s like a visual cocktail, blending separate moments into a harmonious whole that teases the eye and stirs the imagination.
In our journey through the world of double exposure, we’ll unveil the magic behind this captivating effect and explore how it’s used to tell stories that are more than the sum of their parts.
Whether you’re a seasoned photographer or a curious enthusiast, we’re here to illuminate the process that transforms simple snapshots into mesmerizing works of art.

What Is Double Exposure
Double exposure is a technique where two separate images are overlaid to create a single composite.
This effect merges disparate elements, producing a dreamlike fusion that evokes emotion and narrative depth.
Historically rooted in film photography, double exposure has transcended its analogue origins to become a staple in digital filmmaking.
It allows filmmakers to weave visual stories that are ethereal and rich in symbolism.
In cinema, double exposure can manifest as a ghostly character overlay or a haunting flashback integrated into the current scene.
Take Fight Club, where this method was used brilliantly to suggest a character’s fractured psyche.
Or, consider scenes from Birdman, where cityscapes merge with actors’ faces to convey the protagonist’s internal struggles.
The technique is versatile, suited for various film genres and storytelling styles.
As digital technology has evolved, so has our capacity to create double exposure effects with precision and creativity.
Software tools like
The following features are typically used in double exposure effects:
- Opacity adjustments,
- Blending modes,
- Masking techniques,
- Keyframe animations.
Unlike static photography, in filmmaking, double exposure layers can move independently, allowing for a dynamic interplay between the overlaid visuals.
This motion adds another layer of complexity and meaning, giving filmmakers a potent tool for visual storytelling.
It’s the interlaced motion of these images that can turn a simple scene into a mesmerizing narrative moment, revealing the characters’ multi-faceted layers or the intricacies of the plot.
Our exploration of the transformative power of double exposure reaffirms its enduring appeal, showcasing why it’s more than just a visual trick.
It’s an artistic choice that elevates the storytelling in films, enabling a convergence of ideas and a dance between the tangible and the ethereal.
The Artistic Technique
Double exposure has long been a revered technique in the realm of filmmaking.
At its core, it’s a method by which two or more individual shots are superimposed to create a single, cohesive image on screen.
This technique isn’t just about merging visuals; it’s an art form that allows filmmakers to express complex ideas and evoke multiple levels of interpretation.
Artists across various mediums have used double exposure to convey a juxtaposition of time, place, or emotion.
In the world of cinema, this has led to some of the most iconic imagery.
Films like Fight Club and Eternal Sunshine of the Spotless Mind skillfully employ this technique to portray internal conflicts and memories.

There is an inherent poetry to double exposure that taps into the subconscious of the viewers.
It presents them with a symphony of visual cues that can:
- Tell a story without the need for dialogue,
- Symbolize the intertwining of characters’ lives,
- Reflect internal struggles through external imagery.
Historically, double exposure was a product of in-camera effects and lab processing.
Nowadays, digital technology has democratized the process, empowering filmmakers to experiment with this technique during post-production.
With modern software, every frame can be a canvas for storytelling, layering narratives with effortless precision.
What makes this technique such a powerful storytelling tool is its versatility.
Double exposure can be subtle or overt, depending on the filmmaker’s intentions.
It can be used to foreshadow events, to reveal character traits, or even as a thematic leitmotif throughout a film.
Our understanding and implementation of double exposure continue to evolve with advancements in technology.
With every film that integrates this technique, we discover new possibilities and artistic expressions.
When executed with purpose, double exposure transcends its function as a technique and becomes an indelible part of filmic language.
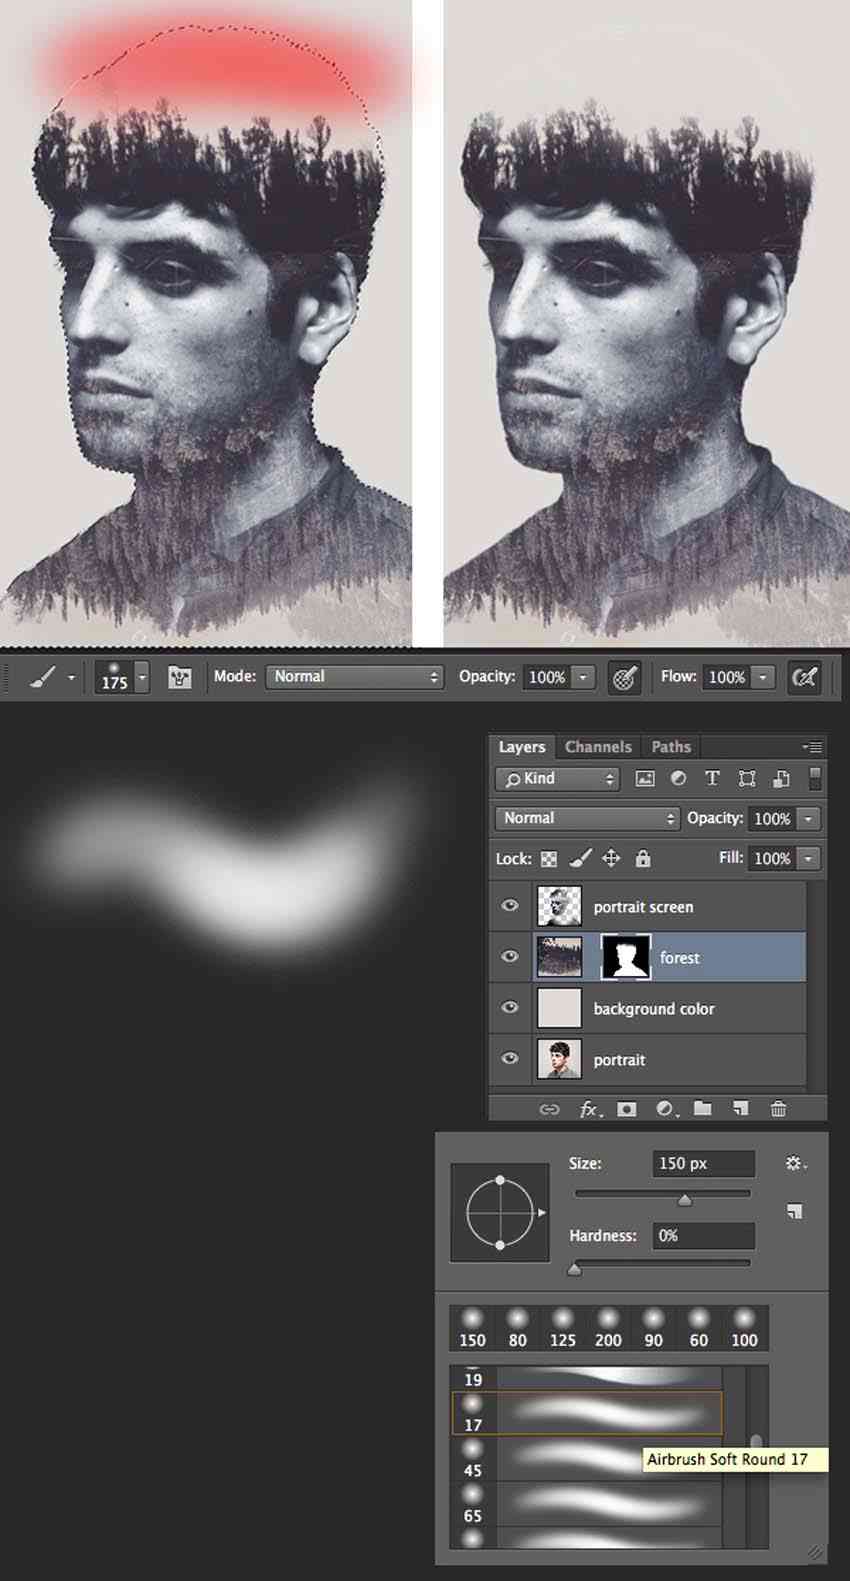
Layers And Blending
To master double exposure in filmmaking, understanding layers and blending is essential.
At its core, it involves stacking visuals to craft a single frame where each layer contributes to the overall image.
These layers are not simply slapped together – they’re meticulously blended.
We use blending modes to dictate how the layers interact with each other, often resulting in ethereal or surreal visuals.
Selective transparency allows certain areas of each layer to be visible.
It creates a narrative within the imagery where the opaque and translucent areas play off one another, revealing the hidden depths of the scene.
Let’s jump deeper into the process:
- Each frame is a layer with its own unique properties and elements. – Blending modes determine the interaction between these layers, impacting the final look of the double exposure.
In Eternal Sunshine of the Spotless Mind, blending was used to evoke the fragility of memory.
This manipulation of transparency and layers seamlessly merged past and present, creating a poignant viewing experience.
Digital tools have streamlined this blending process.
Filmmakers adjust opacity, mask out regions, and experiment with various blending options right in their editing software.
This ease of use means that today’s double exposures can be as nuanced or as bold as we choose.
It’s about merging visual stories in such a way that they complement and enhance each other.
When layers are blended successfully, they allow us to tell a richer, more complex story within a single frame, pushing the boundaries of traditional storytelling in film.
In using double exposure, filmmakers have a powerful tool at their disposal for creating arresting visuals.
The art lies in how each individual shot is blended – a careful balance that can elevate the story we’re aiming to tell.
Creating A Harmonious Whole
As we jump deeper into the artistry of double exposure, it’s crucial to emphasize the synthesis of elements into a cohesive vision.
Merging layers with precision forms a compelling narrative, turning individual frames into story-rich sequences.
The key lies in how each component complements the others.
This goes beyond technical prowess – it’s about crafting a harmonious whole that resonates with the audience.
The marriage of images should not only be visually striking but also thematically consistent.
In Eternal Sunshine of the Spotless Mind, the filmmakers used double exposure to reflect the complexity of memories and emotions.
They expertly intertwined characters and backgrounds to create a visual metaphor for the intertwining of past and present.
Such seamless integration ensures that every layer adds to the film’s narrative depth without overwhelming the viewers.
Our decision-making process in blending modes revolves around these considerations:
- How will the light and shadow in one layer affect the other?
- Does the color palette of the combined layers enhance the intended mood?
- Are there symbolic relationships between the elements being merged?
Digital tools enable us to test and tweak these aspects rapidly until we strike the right balance.
We carefully adjust opacity and employ masking techniques to ensure the coalescence of layers serves the storyline.
Recognizing that too many elements can lead to clutter, we exercise restraint.
Striking a balance between complexity and clarity is crucial.
Our goal is to create double exposures that are both intricate and intelligible, offering viewers a gateway into the story’s heart through a single, powerful frame.
Telling Stories Through Double Exposure
Double exposure transcends traditional storytelling by layering meanings, themes, and emotions.
In Eternal Sunshine of the Spotless Mind, the technique is used masterfully to reflect the complexity of memory and love.
By juxtaposing two visuals, filmmakers weave narratives within narratives.
The resulting images in Fight Club offer a surreal glimpse into the protagonist’s psyche.
Here are key narrative functions double exposure serves:
- Symbolizing internal conflict or duality,
- Illustrating character relationships and connections,
- Enhancing thematic depth.
In Camera Lucida, Roland Barthes writes about the punctum – a detail in photographs that pierces the viewer.
Double exposure in film similarly leverages poignant imagery to elicit a visceral response.
Cinematic double exposure offers a unique avenue for visual metaphor.
Requiem for a Dream utilizes the technique to signify the characters’ fragmented realities.
Cutting-edge software elevates our narrative capabilities with double exposure.
Directors can now execute complex symbolism without sacrificing clarity.
Exploring The Magic
When we jump into the magic of double exposure in film, we’re peering into a world where visual storytelling transcends the usual practices.
The layered imagery captivates audiences, inviting them to unravel the intertwined narratives and symbolic meanings.
Filmmakers wield this technique with precision, crafting scenes that merge reality with the abstract.
Double exposure opens a doorway for viewers to experience the characters’ internal landscapes, merging the psychological with the physical world present on the screen.
In iconic films like Eternal Sunshine of the Spotless Mind, the use of double exposure allows us to navigate the complexity of memory and emotion.
Likewise, Fight Club showcases the protagonist’s fragmented identity, using this technique to blur the lines between his dueling personas.
The progression from traditional to contemporary double exposure has been seamless, thanks to advancements in technology.
Digital tools have enabled filmmakers to achieve complex visual effects without compromising the narrative’s integrity.
Here are some key benefits double exposure brings to filmmaking:
- Enhances narrative depth,
- Symbolizes characters’ internal struggles,
- Offers a unique aesthetic appeal.
Adopting double exposure isn’t merely a nod to artistic heritage; it’s a conscious choice to engage viewers on a deeper level.
We witness this in how scenes unfold, each double-exposed shot acting as a puzzle piece to the broader narrative.
The Process Of Double Exposure
Creating a double exposure effect involves a combination of artistic vision and technical expertise.
As filmmakers, we often begin by envisioning the concept and how it serves the storyline or thematic elements within our projects.
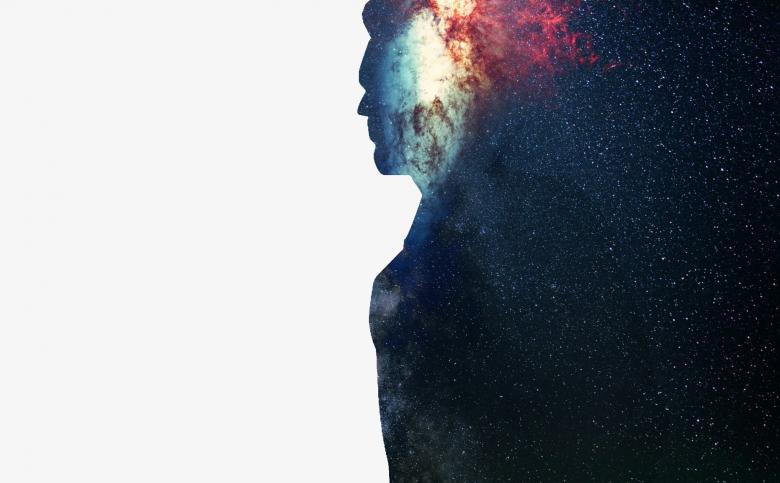
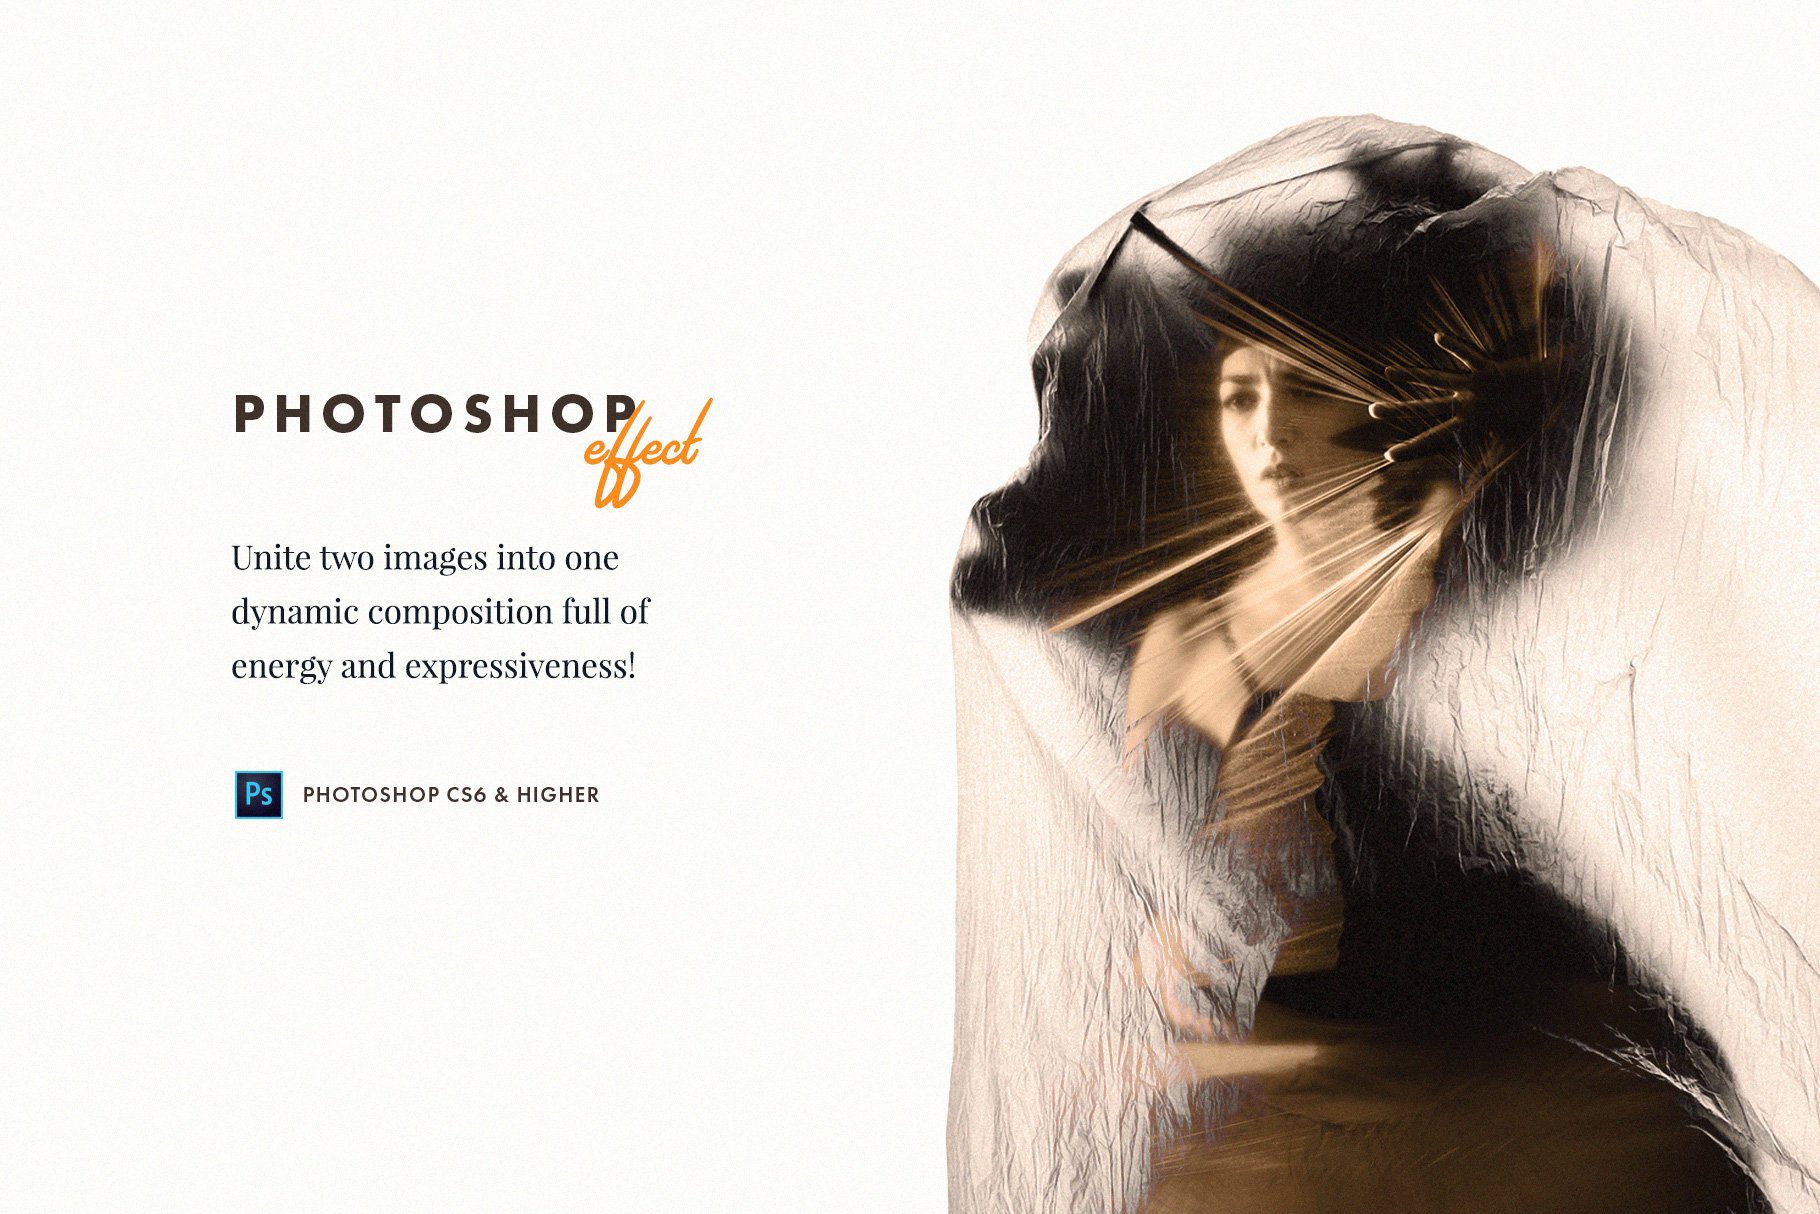
One essential step is selecting the right two images to combine.
These images must contrast and complement each other to create a meaningful and visually appealing result.
Often, the first image forms the base layer, typically featuring a silhouette or a profile, while the second image fills the silhouette with texture or a contrasting scene.
In-camera double exposure is a traditional technique that has been adapted for the digital era.
Historically, it involved exposing a single frame of film to light twice, capturing two different images in the same frame.
Our modern cameras, including DSLRs and certain mirrorless models, mimic this feature digitally, allowing us to experiment with the effect in real-time.
Advanced post-production techniques enable filmmakers to intricately control the double exposure effect.
Using software like Adobe
The process typically encompasses:
- Shooting or sourcing the base and overlay footage,
- Isolating the subject from the background using masking or chroma keying,
- Adjusting the blend modes to combine both layers seamlessly,
- Fine-tuning the transparency, contrast, and color grading to achieve a harmonious result.
This meticulous approach allows us to infuse layers of meaning into our films, challenging the audience to look beyond the surface.
also, we Use motion tracking and other animation techniques to add dynamic movement, giving life to these composite images in a way that static photography can’t match.
From Snapshots To Works Of Art
Double exposure has transcended its initial photographic boundaries, transforming ordinary film sequences into sensational works of art.
Initially confined to the realm of photography, this technique now empowers filmmakers to craft visually arresting narratives that resonate on deeper levels.
We understand the power that lies within the layers of an image – each plane is a story waiting to unfold on screen.
Blending two or more disparate scenes, double exposure demands careful consideration for each component to work in harmony.
We’ve witnessed this meticulous process shape masterpieces like Eternal Sunshine of the Spotless Mind, where characters’ struggles and emotions are vividly painted across frames through overlapping imagery.
The careful selection of which visuals to merge sets the tone for the audience’s emotional journey.
Advancements in technology have unearthed new realms for creativity and expression within the film industry through double exposure techniques.
Software giants like Adobe
While these tools provide filmmakers with more control, they also place a great responsibility on us to use them with intent:
- Harnessing technology to enhance narratives rather than overshadow them,
- Selecting imagery that adds rather than confuses,
- Layering meanings to create not just films, but experiences.
It’s clear double exposure has evolved from a mere photographic curiosity to a staple of storytelling prowess in filmmaking.
Each instance serves as a reminder that films are far more than sequences of shots – they are canvases upon which we paint our boldest ideas and emotions.
And yet, it isn’t just about aesthetics; it’s an opportunity for directors to challenge audiences to peer into the subtext and discover the multifaceted nuances that lie beneath.
What Is Double Exposure – Wrap Up
We’ve uncovered the transformative power of double exposure in filmmaking, revealing how it layers meaning and emotion to create compelling narratives.
By delving into iconic examples and the intricate process behind this technique, we’ve shown how it challenges audiences to see beyond the obvious.
With modern software, filmmakers now have the tools to wield this powerful storytelling device with precision.
Double exposure isn’t just a technical feat—it’s a narrative force that continues to shape the way we experience stories on screen.
As we move forward, let’s celebrate the depth and complexity it brings to the cinematic arts.
Frequently Asked Questions
What Is Double Exposure In Filmmaking?
Double exposure in filmmaking is a technique that combines two different images into a single frame, creating a layered effect that can convey complex meanings, emotions, and themes within the narrative.
Can Double Exposure Be Used To Symbolize Internal Conflict?
Yes, double exposure can be very effective in symbolizing internal conflict, as demonstrated in films like “Fight Club” where it visually represents the protagonist’s psychological struggles.
What Is Roland Barthes’ Concept Of The Punctum?
Roland Barthes’ concept of the punctum refers to an element in a photograph that pierces the viewer emotionally, which can also be applied to double exposure in film to trigger a visceral response.
Do Filmmakers Need Cutting-edge Software To Create Double Exposure Effects?
While not strictly necessary, cutting-edge software provides filmmakers with more tools to merge and refine images, allowing them to create complex symbolism without losing clarity.
How Has Double Exposure Evolved In Filmmaking?
Double exposure has evolved from a photographic technique to a storytelling tool in filmmaking, expanding its use to include in-camera techniques and digital post-production, giving filmmakers greater control over the narrative impact.
Why Is Selecting The Right Imagery Important In Double Exposure?
Selecting the right imagery is crucial as it ensures that the layered images contribute meaningfully to the story and enhance the film’s thematic depth, rather than simply serving as a visual effect.
What Does Double Exposure Add To A Cinematic Experience?
Double exposure adds a layer of meaning to a cinematic experience, challenging audiences to look beyond the surface narrative and engage with the film on a deeper, more symbolic level.