
In the palm of our hands, we’ve got powerful cameras that can capture stunning images on the go.
Mobile photography’s become a game-changer, allowing us to snap high-quality photos without lugging around heavy gear.
We’ll jump into the best tips and tricks to elevate your smartphone shots, from mastering the rule of thirds to finding the perfect lighting.
Stick with us, and we’ll turn your mobile into a pro-level camera, one tap at a time.
Mastering The Rule Of Thirds
The rule of thirds is a fundamental principle in the composition of photographs that elevates the visual appeal of your shots.
By dividing the frame into a nine-part grid, we create intersections that are strategic focal points.
This technique encourages photographers to place their subject or important elements at these intersections or along the lines, making the image more balanced and engaging to the viewer.
Understanding the rule of thirds isn’t just about knowing where to place points of interest.
It’s about learning how perception works and using it to guide the viewer’s eye through the photograph.
By aligning subjects with these guide points, we can create a sense of purpose and direct attention effectively.
For instance, in portrait photography, positioning the eyes at the top intersections can instantly make the photo feel more alive.
Here’s how we can apply the rule of thirds in different scenarios:
- Landscapes – place the horizon on the top or bottom grid line, rather than the center, to add depth to your photo,
- Portraiture – align your subject’s eyes with the top line to give the portrait a natural structure,
- Action shots – give your subject space to move into by positioning them on the opposite side of where they’re headed.
Becoming adept at the rule of thirds takes practice, but once it’s second nature, we can bend or even break the rules for creative effect.

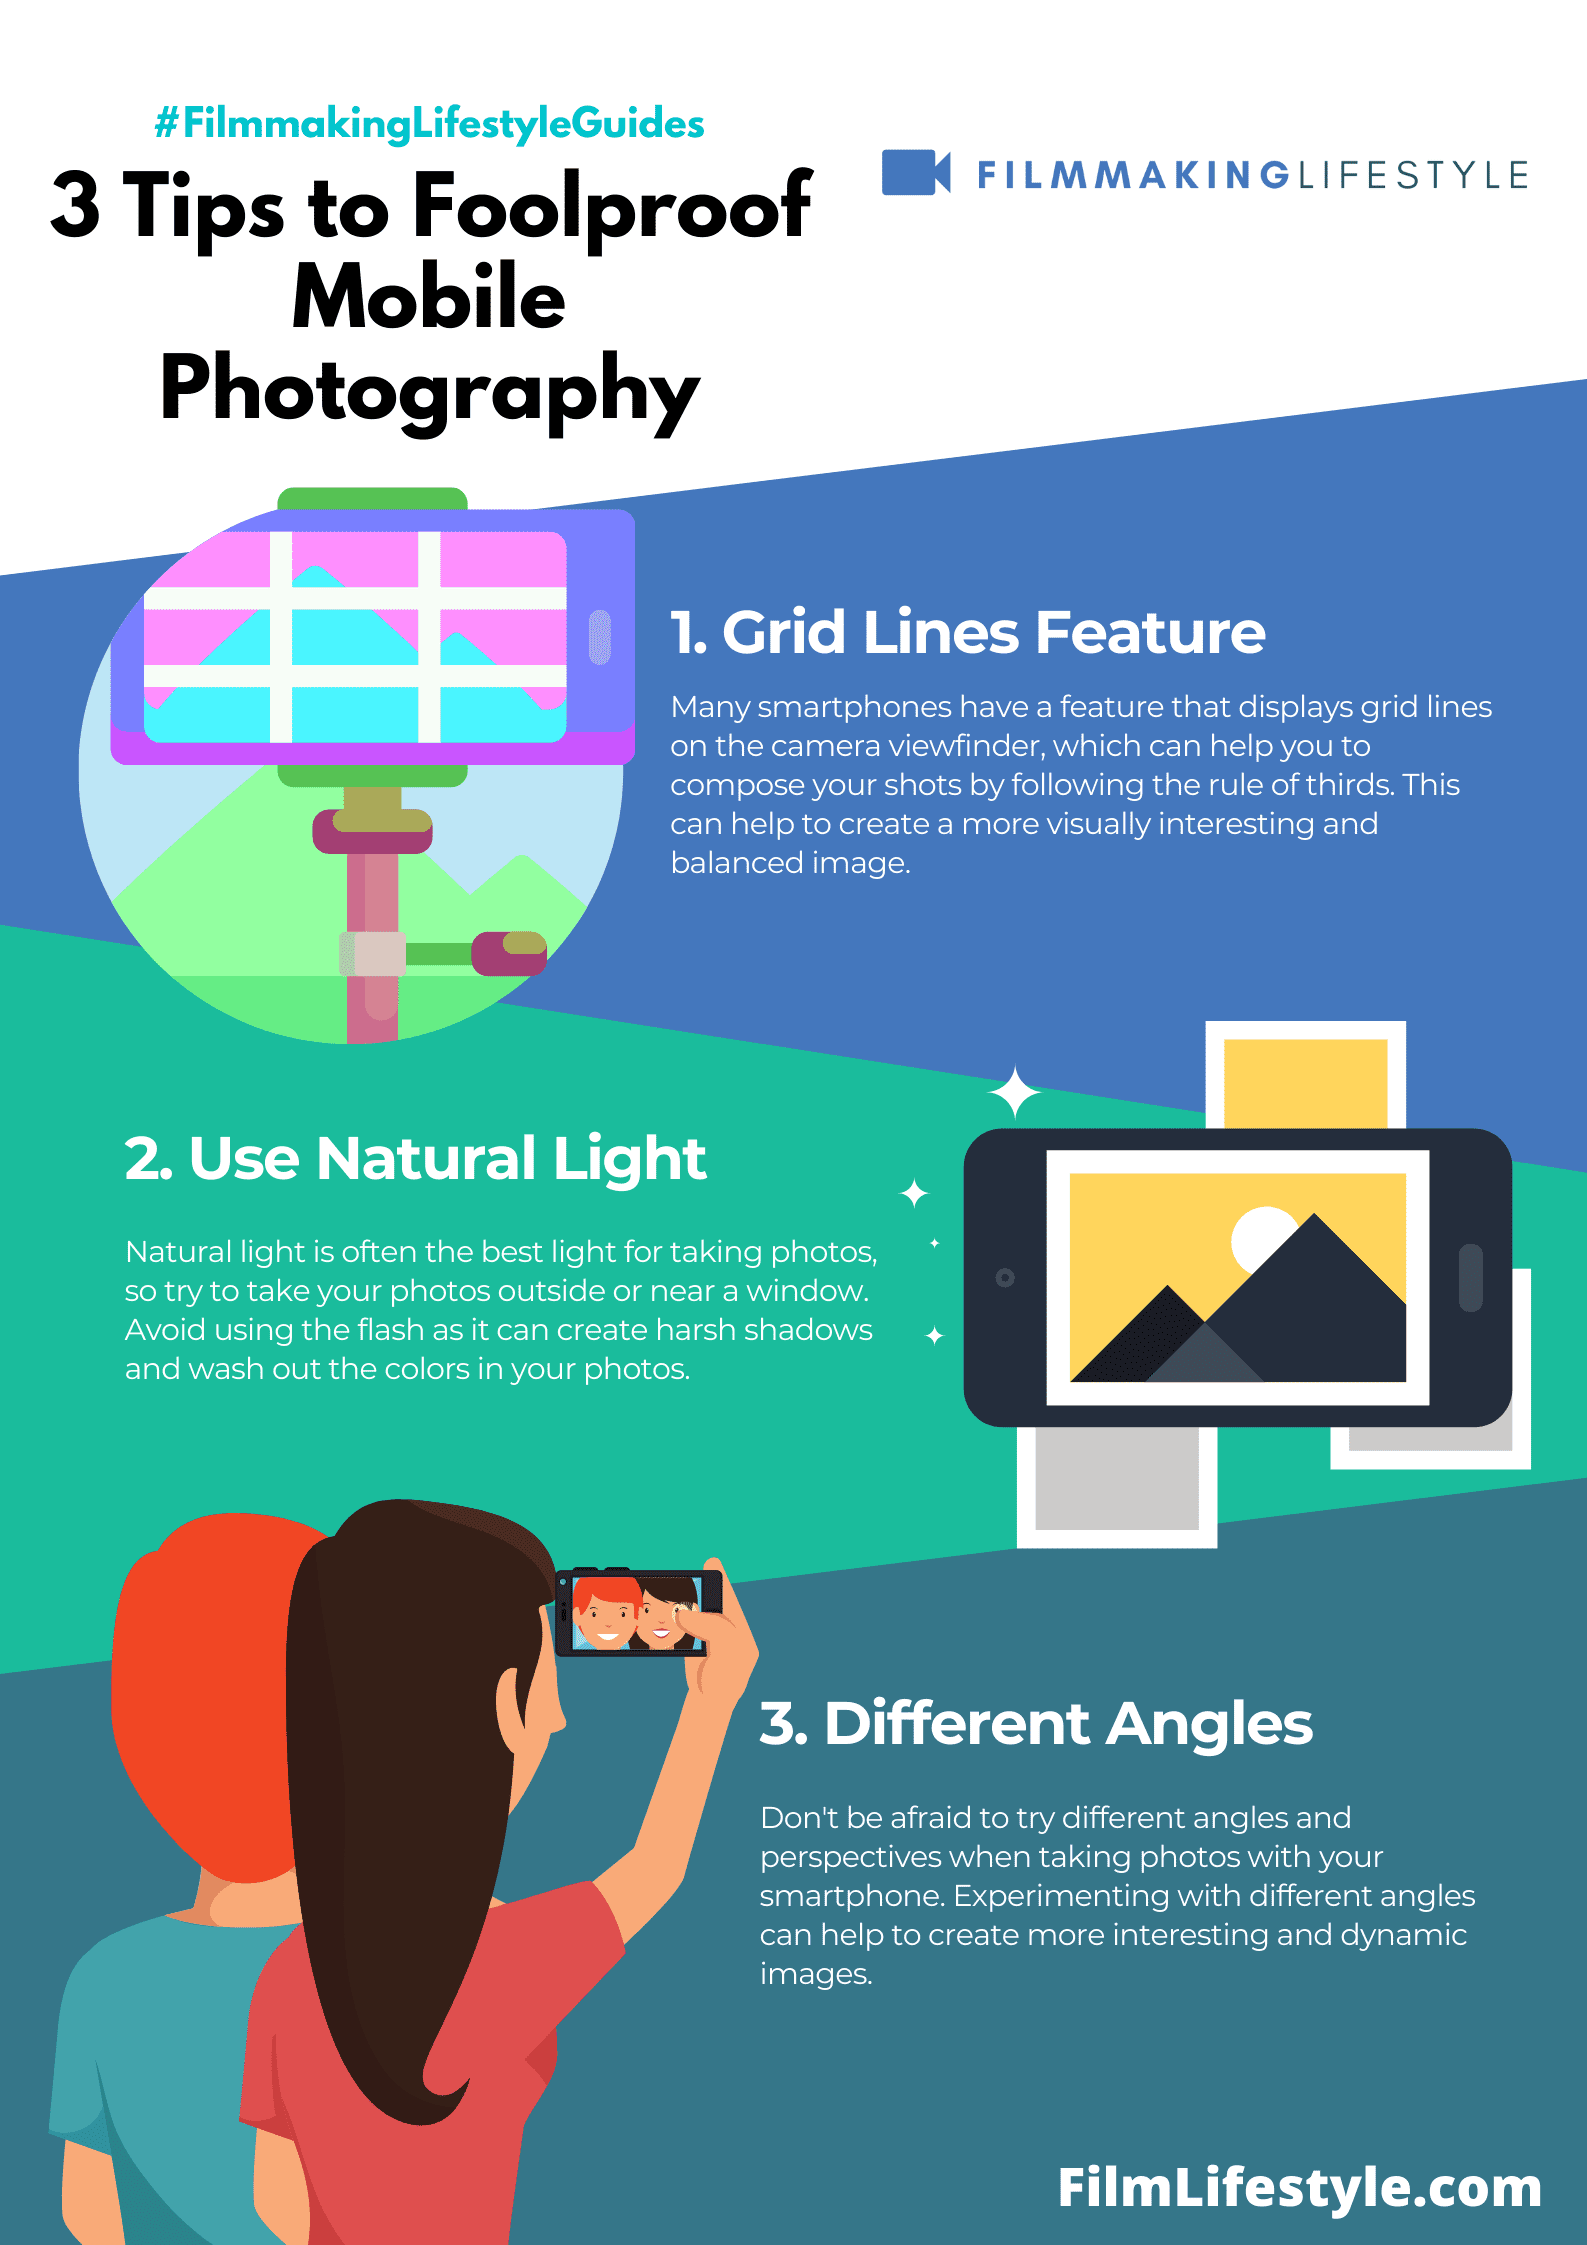
Many smartphones offer a grid overlay feature which can be turned on when composing shots.
Use this tool to our advantage in the beginning and eventually, we’ll find ourselves framing shots with precision, even without the grid.
Finding The Perfect Lighting
Good lighting is the backbone of stunning mobile photography.
We know hunting down that flawless lighting setup can elevate an image from good to breathtaking.
Here’s how we navigate the challenges of finding the perfect light, no matter where you are.
Natural light, especially during the golden hour, brings out an ethereal quality that’s hard to replicate.
This magical time occurs just after sunrise or before sunset when the light is soft, diffused, and simply flattering.
Harnessing this light can transform a basic snapshot into a masterpiece.
Often, the harsh midday sun casts strong shadows and may not be ideal for shooting.

But if we’re trying to capture contrast and texture, this lighting can be incredibly effective.
Consider cloud cover too – overcast conditions provide a large natural softbox, softening shadows and reducing contrast.
When indoors, window light becomes our best friend.
Position your subject near a window to achieve a soft, directional light.
For a more dramatic effect, explore the interplay of light and shadows to add depth to your shots.
Artificial light sources, including street lamps and neon signs, can create compelling images, too.
We love experimenting with these sources at night, embracing the colors and vibrancy they bring to our photos.
Here are some practical tips:
- Always assess the light before you shoot, adjusting your position to find the best angle.
- Use reflectors – even a simple white sheet can work – to bounce light onto subjects.
- Modify artificial light with diffusers to avoid harsh shadows.
Remember, it’s not just about finding the light but also understanding its quality and direction.
Great photographers observe and adapt, using light to tell a story and evoke emotions.
And with a smartphone in your pocket, you’re always ready to capture that perfect moment when the lighting is just right.
Using Composition Techniques
In the realm of mobile photography, mastering composition techniques can truly elevate our images.
Beyond the rule of thirds, we’ve got several other tricks up our sleeve.
Let’s jump into some that can make our photos stand out.

Lead-in lines are a powerful tool we often use to guide the viewer’s eye.
Think of roads in landscapes or walkways in city shots – they draw us into the scene, creating depth and perspective.
Even the edge of a table can lead the eye to the subject in a still life photograph.
Framing is another technique where elements in the foreground frame the main subject, adding context and focusing attention.
The window of an old building could frame a bustling street scene, or branches could encircle a mountain peak.
Such framing gives a peek into the world we’re capturing, inviting viewers to step in.
We mustn’t forget about the importance of symmetry and patterns – they add a compelling visual rhythm to photos.
Reflective surfaces like water or glass provide opportunities for symmetry, while architectural details and natural textures can manifest as engaging patterns.
Here are more composition techniques we often consider:
- Negative space – simplicity speaks volumes, allowing our subject to breathe,
- Juxtaposition – placing contrasting elements side by side for a striking effect,
- Balance – ensuring elements in the frame distribute visual weight evenly.
Recognizing when to Use each composition element comes with practice but trust us, it’s worth the effort.
Whether we’re snapping candid moments or seeking the perfect shot on our travels, these techniques can transform simple photos into captivating stories without uttering a single word.
Exploring Camera Settings
When we jump into the heart of mobile photography, mastering camera settings emerges as a crucial element.
Understanding the plethora of options your mobile camera offers can drastically improve the quality of your images.
The first setting to consider is ISO – this controls the camera’s sensitivity to light.
A lower ISO number means less sensitivity, which is ideal for well-lit environments.
Conversely, a higher ISO can aid in darker settings but might introduce grain into the image.
Exposure compensation is another vital feature.
It allows us to tweak the brightness of our photos before taking them.
Adjusting exposure helps in bringing out details that might otherwise be lost in the shadows or highlights.
- Adjust for landscapes – use a lower ISO to capture crisp details,
- Opt for higher ISO in low light – but beware of the increased noise,
- Play with exposure – to highlight the best parts of your scene.
Shutter speed affects how motion is captured, a slower speed will blur motion, whereas a faster speed will freeze action.
While many mobile phones adjust shutter speed automatically, some apps provide manual control.
Focus is essential in photography and smartphones offer different focus modes.
Tap-to-focus is the most common, letting you decide the focal point.
Some devices also offer manual focus for more precision.

- Use a faster shutter speed to freeze fast-moving subjects,
- Employ a slower speed for creative blur in moving elements like water or traffic,
- Experiment with focus modes – to get sharp images where it counts.
Aperture, while often fixed in mobile cameras, affects the depth of field of your photos.
A wider aperture allows for more light and a shallower depth of field, which is perfect for portraits where you want the subject to stand out from the background.
White balance adjusts the color temperature of your photos.
It helps in making sure the colors in your image appear as natural as possible, which can be crucial depending on the light source.
- Tweak white balance to correct color tones,
- Use preset settings – such as daylight, cloudy, or tungsten – to match your environment.
Exploring these settings enhances our storytelling through visuals.
With the right adjustments, we can translate the scene before us into stunning photographs that speak volumes.
Editing And Enhancing Your Photos
Editing is the final yet crucial step in mobile photography.
It’s where we turn good photos into great ones.
Understanding how to edit your photos effectively can elevate them to a professional standard.
Most smartphones come with built-in editing tools, but for more advanced features, we often turn to apps like Lightroom or Snapseed.
These apps offer a range of options – from simple tweaks to detailed adjustments.
The Basics Of Photo Editing
Let’s start with the basics.
Adjusting brightness and contrast is usually our first step in the editing process.
This helps in enhancing the overall balance of the photo’s exposure.
One should also pay attention to:
- Cropping for better composition,
- Straightening for aligned horizons,
- Adjusting the saturation to make colors pop.
Advanced Techniques
Once we’ve covered the basic edits, we jump into more complex techniques.
Selective editing allows us to modify specific areas of our photos, such as sharpening just the eyes in a portrait or darkening the sky for a dramatic effect.
Another effective tool is the use of filters and presets – these are fantastic for maintaining a consistent look across all your photos.
But, remember to use them sparingly to avoid over-processing.
Color Correction And Grading
Color plays a vital role in setting the mood of our images.
With tools for hue, saturation, and luminance, we can transform the feel of a photo to suit the story we’re trying to tell.
White balance adjustment is also key to ensuring colors in your images look natural.
It allows us to correct color casts that often occur due to different lighting conditions.
Sharpening And Noise Reduction
In our quest for crystal-clear images, sharpening is a must.

It helps in bringing out the details.
But it’s imperative not to overdo it as it can introduce unwanted noise.
For those inevitable low-light shots that come with graininess, noise reduction tools are a godsend.
They smooth out the pixels and deliver a cleaner look without compromising too much on detail.
Mobile Photography Tips – Wrap Up
We’ve armed ourselves with the essentials of mobile photography, from harnessing the rule of thirds to mastering the perfect lighting.
Our journey has shown us that with a few simple adjustments and a dash of creativity, our mobile devices can capture stunning images that tell compelling stories.
By embracing the power of editing, we’ve learned how to refine our shots, ensuring every photo we take stands out.
Let’s keep pushing the boundaries of what our smartphones can do, and remember, the best camera is the one that’s with us.
Happy snapping!
Frequently Asked Questions
What Is Mobile Photography?
Mobile photography refers to the art of taking photographs with a mobile phone camera.
It allows for on-the-go capturing of images with the convenience of a device that you carry with you at all times.
How Does The Rule Of Thirds Work In Mobile Photography?
The rule of thirds involves dividing the frame into nine equal rectangles, three across and three down.
You then place the important elements in your photos along these lines or at their intersections to create a balanced and visually interesting composition.
What Is The Importance Of Lighting In Mobile Photography?
Lighting is crucial in mobile photography as it can significantly affect the mood, texture, and quality of the image.
Adequate lighting helps in capturing sharper images and bringing out the colors and details in the photograph.
Can You Adjust Brightness And Contrast In Mobile Photo Editing?
Yes, adjusting brightness and contrast is a fundamental part of mobile photo editing.
These adjustments can help enhance the overall exposure of the image and make the colors pop.
What Are Some Advanced Editing Techniques For Mobile Photos?
Advanced editing techniques for mobile photos include selective editing, applying filters and presets, color correction and grading, sharpening, and noise reduction, which can all contribute to a more professional and polished look.
How Can Editing Enhance Storytelling In Mobile Photography?
Through editing, photographers can alter the mood, focus on certain details, and adjust colors to match the story they want to tell.
Editing allows the creator to guide the viewer’s attention and to emphasize the narrative that the image conveys.
