
Vlogging has become one of the most popular modern methods for people to communicate, share, and educate around the world.
If you need to know how to change a tire or want to know where to go on your next vacation, all you need to do is head to YouTube to find a vlogging channel that will give you the information you are looking for.
Thousands of new vlogs or video blogs are started every month. The range of topics covered is virtually endless.
Most vloggers consider themselves to be experts in their niche, but that doesn’t necessarily mean that they were experts at cinematography when they started.
Low-quality vlogs are not as popular as those that have taken the time to learn how to produce visually pleasing videos.
Essentially, viewers will put more trust in vlogs that appear to know what they are doing, not just what they are saying.
Intro To Lighting Your Videos
If you are just starting out and want to produce a good quality vlog, the most important aspect beyond quality content is having the right lighting.
Videos that are dark, blurry, or shadowy tend to end up looking amateurish, which will not build confidence in your viewers.
The good news is, that you don’t have to be a technical wizard to produce well-lit videos.
It takes a bit of work, a small investment, and the knowledge to help you pay attention to your environment and natural lighting.
Many vloggers like to take their viewers to different filming locations.
Unless you are going to create a permanent set, like a kitchen for your cooking videos or a garage for your auto repair vlog, it’s likely that you will need to know a few tips for lighting your videos wherever you are.
Permanent lighting setups are not practical for all vloggers and tend to be more elaborate and expensive.
In this article, we will take a look at a few generalized lighting tips for new vloggers.

Using these tips and tools like lighting rings from LF Illumination can help you produce bright and professional-looking videos that will thrill your viewers and help you build a loyal following.
Let’s look at a few general rules for filming your first videos, and then we will cover the best lighting setups that will help make your videos shine.
Video Lighting Tips
Your viewers want to be able to see you clearly when they are watching your videos. If you are filming outside and taking advantage of the sun’s natural light, there are a few things to keep in mind to get the best footage.
Face Towards The Sun
When filming outside, always face towards the sun. If the sun is so bright that it affects your vision, you can turn your stance slightly to the side to avoid the glare.
You want the sunlight to be shining on your face so that viewers can see your face clearly.
When you set up your stance with the sun facing your back, your form will be backlit, creating shadows on your face.
Don’t Stand Directly Underneath An Overhead Light
If you are filming in a room, do not stand directly underneath your overhead light. This will create shadows on your face.
It’s better to stand to one side of an overhead light to get the best video.
Eye Contact
Viewers need to build trust with you to become loyal followers. The power of eye contact can’t be understated in relationship building.
If you are filming outdoors, it’s critical that you remove any sunglasses or eyewear that could create a glare for the camera. Viewers prefer to look you in the eye when watching videos.
Don’t Cover Your Face
Don’t cover your face unless necessary due to severe weather. Take off your ball or sun hat if it creates a deep shadow across your face.
Best Lighting Setups
Let’s take a look at some of the main video lighting setups.
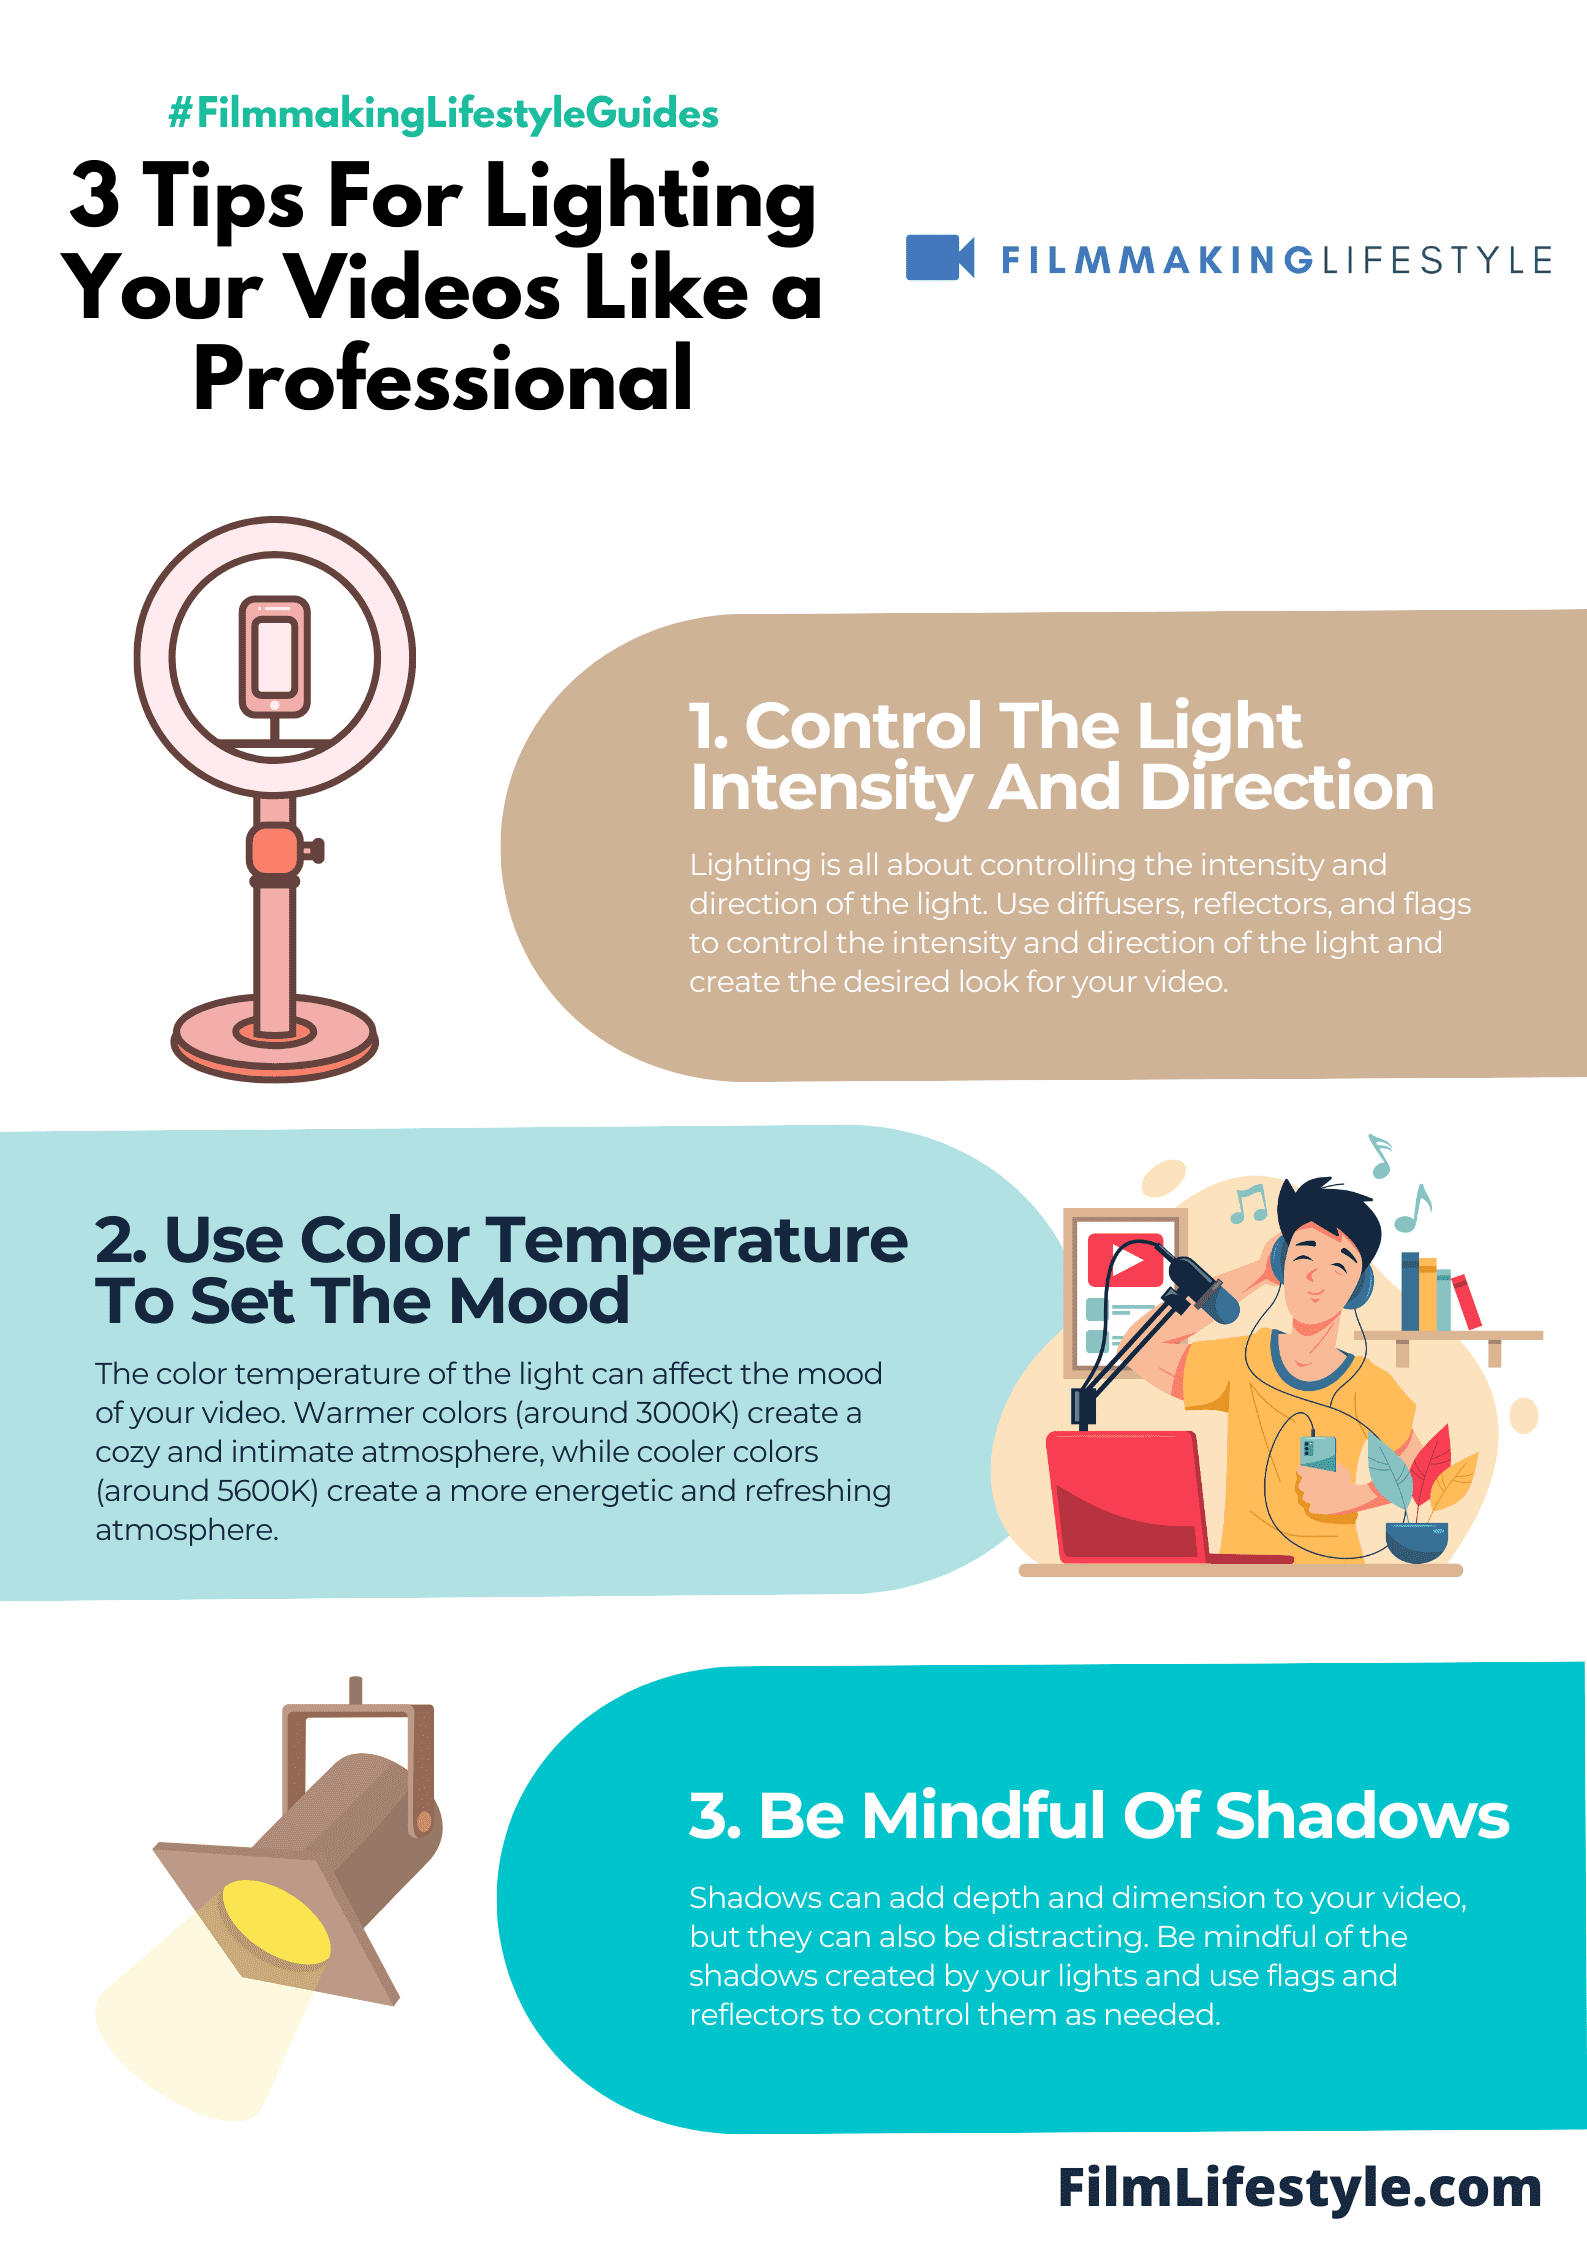
Three-point Lighting
The three-point lighting setup is the most basic and effective way to light your videos.
While this setup requires various equipment, it can be used in many different indoor filming scenarios.
Your three-point lighting system is made up of a key light, backlight, and fill light.
Combining these three light sources helps reduce any shadows or harsh lighting and reflects you in the best way.
Key Light
Always the brightest source of light in your trio.
If you are outside, the sun would be your key light source.
For indoor shoots, a natural light source like a window could act as a key source.
For enclosed video shoots, you may want to consider an LED panel or ring light for your main key light source. Your key light should be placed to one side of your camera.
Fill Light
With your key light placed to one side of your camera, it will create a slight shadow along one side of your face.
To be equally lit, you will need to use a fill light. This softer and less brilliant source should be placed on the other side of the camera.

Backlight
The final point in your lighting triangle is your backlight, also referred to as the “hair light.”
This source should be placed slightly behind and above your subject. This light needs to be high enough that it can’t be seen in your video shot.
Use Natural Light
The sun is the best and purest form of video lighting. Whenever possible, using natural light will help you to get the right look for your videos.
Setting up your shot near a window or heading outside to record your video will help you to simplify your shoot and get great lighting.
For vloggers that are on the move, traveling light without a lot of bulky equipment is the key.
Finding places to film where you can take advantage of natural light is a key aspect of getting great-looking footage.
Focus Your Key Light
When setting up your key light, it’s essential to focus on your subject and limit the amount of light hitting your background.
You can achieve this by mounting a framing implement around your light, allowing you to narrow or widen the scope of light.
If you are using natural light like a window, take advantage of your drapes or blinds to focus the amount of light that you are letting in.
Halo Lights
Many solo vloggers use halo lights to help them get the best-looking videos. These simple rings of LED lights come in all sizes to accommodate your filming style.
You can get them to attach to your laptop, your phone, or a larger ring that mounts to its own stand or your extra tripod.
Most ring lights will give you a focused beam that will help you look your best on video.
When shopping for halo lights, try to find one that has different light intensity settings so you can have flexible lighting options for any environment.
Reflectors
If your key light is too strong, you could end up squinting into your camera. To eliminate strain on your eyes, many professional videographers choose to use reflectors to soften the glare of their key lights.
A set of reflectors are affordable and come in different materials so that you can customize your look.
For example, you can use a translucent reflector in front of your key light to give you a softer look and reduce the strain on your eyes.
If you are thinking about sharing your expertise by starting a video blog, you will want to do your research about how to create quality content.
Building an audience is an important part of your success.
Viewers want to see videos that are well-produced, contain interesting content and have great lighting. Follow these tips to help you achieve vlogging success.