These guides will take you from initial beginnings in video business, walking you by the hand through to a more intermediate understanding and will finish with more advanced concepts towards the end. In this first article in the series, we’re going to be covering the video equipments you need to get your video business of the ground.
I understand that you might be starting from a complete beginners perspective. Either you have no idea about business or you have no idea what video equipment you’ll need to get started.
I wish I had an easy to use guide to getting started when I first begun my business. I just wanted to know step-by-step what to do, but I couldn’t find that information anywhere.
This section will cover everything, so that you can get started with minimal complications and distractions.
I want to give you a really quick way to get started in this business. This is an overview with ACTION STEPS of exactly what you need to do. No BS, straight-to-the-point, so that you can get started today!
Please note: I will be covering all these points (and more) in detail later on in the course. This is a section for those looking to jump right in now.
Here’s a chart showing what we’re going to cover in this Quick Start Guide:
So without further ado…
Step 1 – Getting What You Need – Video Production Equipment
To get started you need the basics and nothing more. If you’ve already got video equipment, then that’s great. I’m going to assume that some of the people read these guides have already got at least a video camera (hopefully a DSLR) and possibly other kit.
If not, then that’s fine, too.
If you’ve been reading my posts for a while, you’ll know that I don’t write too much about video gear and the technical side of film and video production. This is mainly due to the fact that equipment is an ever-changing issue and filmmaking tools are constantly being updated.
And, to be honest, too many people get stuck on this issue and spend huge amounts of time trying to keep abreast of all the changes and updates for everything they own (and even stuff they don’t own!)
With that said, this isn’t meant to be seen as some all-encompassing look at every piece of equipment you could own. This is a rough guide covering just some of the key items that you’ll need to start your video production business empire.
I’m not going to be too specific with a lot of these tools because, as we’re all only too acutely aware, technology evolves so fast – I don’t want this article to be outdated in a year’s time. I’ll speak in general terms, but be specific where needed.
This is a list of the essentials that you will need to start your video business right now:
1. A DSLR Camera
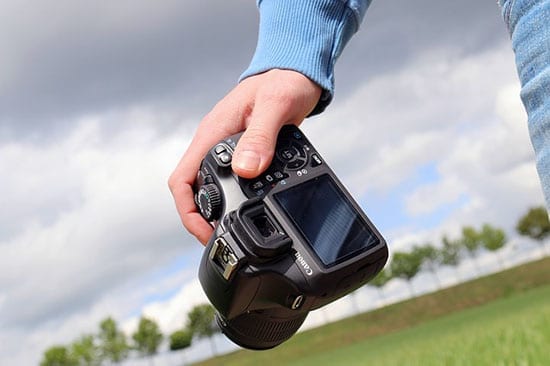
As you might be aware, DSLR cameras are taking over the world right now. What people have come to realize in the last 5 or so years is that DSLR cameras (that’s Digital Single Lens Reflex) aren’t just great for taking photos (their initial use), but they also have amazing video capabilities.
We call it the “DSLR Revolution” because these cameras have pretty much changed the way the indie filmmaker and videographer works/does business.
This isn’t your uncle’s large, unwieldy “video camera” that he used to shoot family gatherings and weddings with. These are small, easy to handle cameras that produce fantastic looking results. You might have heard, and it’s true that DSLR cameras have been used to shoot Hollywood movies.
You can pick up a Canon 5D mark ii for under $2,500 with a good all purpose lense that will get you started.
That brings us to…
2. Lenses
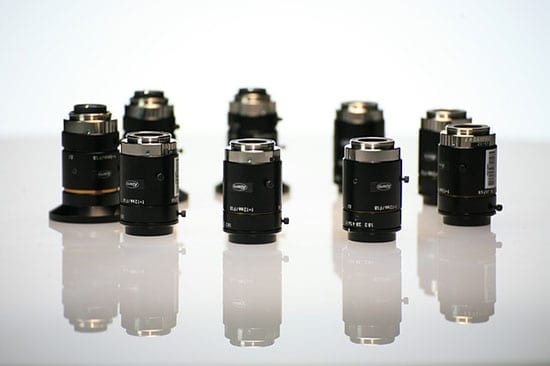
I’m here to break it to you – you don’t need a tonne of lenses to get started in this business. Remember, we’re talking about the essentials to getting started – you can always hire lenses as needed depending on the job and its requirements.
If you go the Canon route (as I recommend above), you can get a good all-purpose lens with your camera for around $2,500 (Canon 5D mark ii camera + 24-105mm kit lens). This will get you started and shooting.
Here are a couple of great ‘go-to’ lenses when you first start out:
– Canon 24-70mm 2.8
– Canon 50mm 1.8
A quick word on what those numbers above mean (and, again, this isn’t meant to be an out-and-out detail tech guide):
– The number with the mm after it is the focal length. Focal length describes the distance between the centre of a lens and its focus. Or, put more simpler – the higher the focal length, the further away you can capture video from. This is a very basic reading of a highly technical process, but it’s a good rule of thumb.
Higher focal lengths are not necessarily better (a common misconception of those new to video or photography). They’re just better in certain situations. Bigger focal lengths nearly always mean more sizeable lenses. But, at the end of the day, it all comes down to creative decisions on a wedding shoot. Some action demands a close-up shot, some a shot from further away. Bigger isn’t better, it’s just used for a different situation.
– The second number (in this case 2.8 and 1.8) describes the f-stop (in photography circles, this will nearly always be described as the maximum aperture). The lower the f-stop number, the more sensitive the lens is to light. So lenses like the two mentioned have relatively small f-stop numbers and therefore are good for low-light conditions.
The Canon 24-70mm is a great walk-around lense, as is it’s cousin, the Canon 17-55 2.8. The focal length is perfect for event videography and the distances it captures normally cover about 95% of distances you’re likely to have at events like weddings.
Obviously, there are lenses for other more niche situations – such as when your subject is somewhere in the distance, on a hill, for example. In those cases, something like the Canon 24-105mm is handy.
Of course, we’re into the realms of creative shot decisions at this point – a videographer could, naturally, just walk a little closer to be nearer his subject.
The Canon 50mm 1.8 is a great little lense – especially brilliant for capturing two-shots – that is, two people talking. It’s also has great performance in low-light, so especially effective for something like the latter stages of a wedding reception, when the natural light fades outside.
The low f-stop means that this lense is also fantastic for capturing shallow depth of field video. This produces the cinematic look where the background is blurred out and the foreground (often people) are in focus.
Like anything else in life, there are of course alternatives. Nikon make some brilliant lenses, as well as fantastic cameras that rival Canon’s range in a lot of ways. For cheaper alternatives to Canon and Nikon lenses, there are Tamron and Sigma. There is much debate about the quality and durability of the so-called “cheaper lenses,” but this is definitely something to be aware of if you’re on a budget.
Bonus tip: a great deal can be had for a Canon 50mm 1.8 lens, which can be picked up for around $80. This is a real hidden gem of a lens that’s a great, affordable solution for someone starting out. This lens will get you great depth of field and awesome cinematic looking shots for the price of a years supply of Netflix!
Important note on lenses: eventually you’ll want to invest in better and better lenses. What you’ll find is that a good lens will (probably surprisingly) cost you more than a camera body. It will also last you longer. It’s not unusual for a good lens to outlive multiple cameras.
3. A Laptop
Once we’ve filmed footage, the next step is to upload the camera footage ready for editing. I personally use Apple Mac computers and laptops.
One important safety measure you can take is to bring a laptop with you, as well as multiple hard-drives (internal and external) on every project you shoot.
You’ll shoot a lot of footage, especially at something like a wedding. This can be spread over multiple memory cards.
To avoid memory card failure issues, I’d recommend regularly transferring footage onto the laptop and the hard drives to prevent any potential loss of data.
Beyond editing your videos, a laptop is an essential business tool that will perform a range of tasks.
Not least of which is running your website and showcasing your portfolio of work. More on that later on in the guide.
Why a laptop and not a desktop solution? A laptop will allow you to be more mobile.
You can take your laptop on production shoots and upload footage directly from your camera onto it.
My recommendation is for Apple’s MacBook Pro. It’s a great intermediate solution and a fantastic piece of kit.
Obviously not going to be as powerful and quick as a desktop solution, but if you kit your Pro out with 8MB of RAM (most come with 4MB), you’ll be well on your way to getting great results from this machine.
By the way, we have Gear Buyer’s Guides on every type of Filmmaking Equipment!
(Feel free to open some of these in new tabs whilst you finish the article.)
4. Editing Software
You need a good editing software solution in order to put together and edit the video that you capture with your DSLR camera.
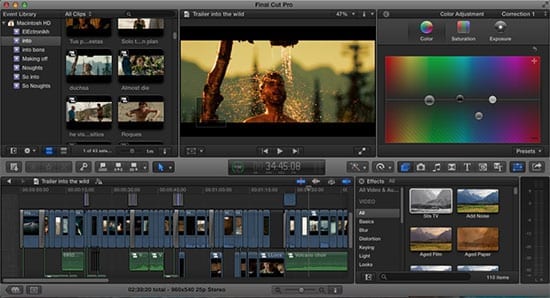
Going along with the theme of me recommending specific products, I’m going to put myself on the line and straight-up recommend Apple’s Final Cut Pro X:
Sure, there are other editing platforms out there, but this is my favorite. Perfect for the beginner to video editing (the learning curve isn’t too steep) and also still great as you get more intermediate.
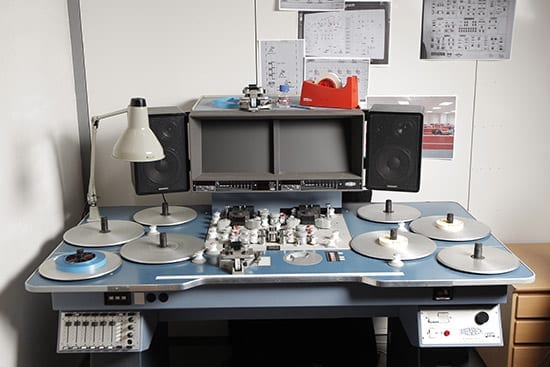
During my time studying film production at film school, we were taught to use the ancient Steenbeck editing machines. These are old-fashioned flatbed editing systems that were used most commonly from the 1950s-1970s, where practitioners would painstakingly edit hundreds of reels of 16mm or 32mm film.
Here’s a picture so you can see their true scale and ferocity:
Anyone who’s sat down at one of these things comes away with a newfound respect for anyone who plied their trade with one of these beasts! They really are cumbersome compared to their modern computerised counterparts, but it’s an incredibly illuminating process to learn.
Each frame of film existed in a physical form, and if you wanted to make a cut in a scene you’d need to physically cut it using something that looks like a sellotape dispenser and then (literally) glue it back together.
Here’s a video to show you just what the process involved:
So as a young student just a few years ago, we were instructed to edit 16mm film on these with the intention of teaching us the foundational pricniples of editing – which are the same whether you’re using a flatbed machine by hand, or editing on a computer. I guess they were also teaching us how easy we have it now that everything can be done on a computer!
Back to modern times: Apple’s computerized editing solution is a breeze to use and the updates since the initial release of version 10 have greatly added to the usability and power of this software.
Apple’s Final Cut Pro can be picked up for around $300 from Apple’s App Store, depending on what deal is on this week.
A great alternative is Adobe’s powerful Creative Cloud range of products. A monthly (and reasonable) cost will get you, among others, Adobe’s Premiere and After Effects video editing software.
There are cheaper alternatives, of course. There’s the very affordable Sony Vegas and Pinnacle still have an editing software called Pinnacle Studio. Then there’s Apple’s iMovie, which is a basic solution that comes bundled with a lot of new Macs.
I’m an Apple fan buy. So sue me!
But, seriously, as you get more into this stuff, you’ll find that most working creatives prefer Apple products.
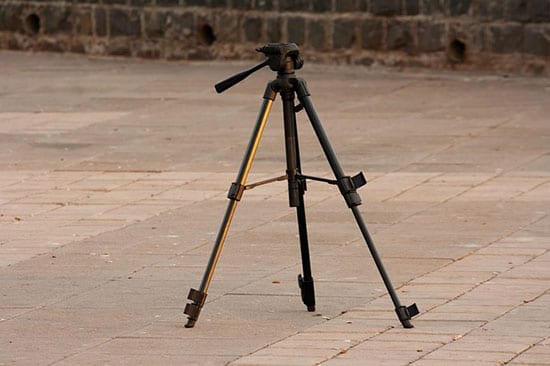
5. A Tripod & Glide Video Equipments
I’m going to make a bold statement: you can’t shoot good video without a tripod.
At least a tripod. Sure, there are other stabilization tools out there for the filmmaker. But, again, we’re talking about the essential starting tools of the trade here.
Lots of videographers who come into this business from a photography background just simply don’t get this: You can’t film professional looking video without a tripod. It’ll just look shaky like that footage you took in Ibiza with your camcorder after a few too many of Jimi Costa’s rum-based beachside cocktails!
If I was to give someone new to videography a solid (pardon the pun!) tip, it would be this: Get a great tripod and you’ll never shoot an annoyingly shaky shot again. You’ll be able to pan left to right smoothly, taking your shots from the realms of vacation footage into professional looking territory. As well as the pans, you can get great looking tilt (up and down) movements.
Get a great tripod and never shoot an annoyingly shaky shot again. You’ll be able to pan left to right smoothly, taking your shots from the realms of vacation footage into professional looking territory. As well as the pans, you can get great looking tilt (up and down) movements.
Invest in a tripod first, learn it, and then consider other stabilization tools like monopods, sliders, etc.
There, I wetted your appetite!
My tripod recommendation: get the Manfrotto 755XB with a good fluid head. Investing in a great fluid head will enable you to do the smooth moves and improve your shots massively. There are plenty of other tripods out there for all sorts of situations and budgets.
I include “Glide Equipment” here as it’s a question that is often asked by readers who want to know the latest slider recommendations I have. Like I said, I’m not for swotting away too much on technical descriptions and trying to keep up with the latest kit on the market.
So the most obvious form of “glide equipment” that you should carry is a basic slider. What the slider enables us to capture are those awesome “gliding” shots as the camera seems to flow smoothly.
The slider is basically a small length of “track” with a plate to allow the camera to sit comfortably. The slider track works like the “dolly track” in traditional filmmaking – tracking shots are possible, as well as smoother pans from left to right. We can also get a cool effect that looks like zooming, but isn’t. This is the infamous “dolly zoom” of filmmaking and can actually be achieved with a slider and a decent lense.
For the most famous use of a “dolly zoom” in Hollywood movies, check out this clip from Martin Scorsese’s classic Goodfellas:
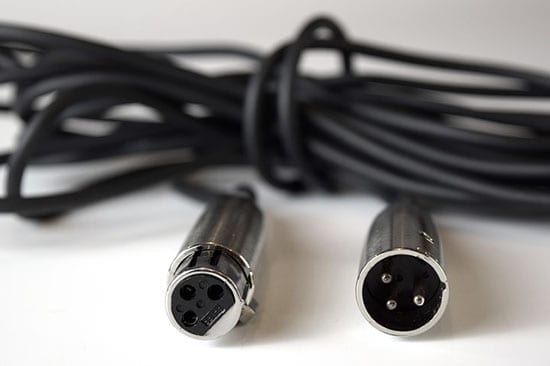
6. Sound Gear
Sound – listed last but it’s so, so important. Not many people outside of professional videographers/filmmakers realize the real ‘make-or-break’ issue with sound quality. Clients often don’t understand when I try to explain just how important good sound is to the quality of their video productions, but they always understand when they hear the results!
An important thing to remember about sound is its absolutely
That stuff gets turned off right away. And it shows the true power of sound.
With that said, your Canon 5D will capture decent sound. Sound is a much debated and controversial issue, and “decent sound” more so. Let’s put it out there: it’s a very subjective matter.
Look, you can capture “decent” sound with your Canon 5D in-camera mic, but decent isn’t something you should be striving for. We want awesome!
Getting sound right is so important, and it’s the most stressful aspect to get right on the day, as the variables can be so different depending on the location.
Top notch sound comes from off-camera mics. We have all sorts of options at our disposal, but here are a couple of good ones that work great in all situations. I’m going to give you two affordable solutions. Two solutions out of many possible options. One mic for on the camera and one mic for off camera.
On-camera: the Rode VideoMic.Off-camera: the Zoom H4N
The Rode VideoMic sits neatly on top of the DSLR camera. This is great for picking up chatter as you go around at event productions like weddings, as well as ambient noise that can be mixed into the film when you come to edit.
The Zoom H4N is a recording device with a built in microphone. I use it a lot for capturing great sound during interviews in various types of production
A quick note on weddings, as it’s one of the bread-and-butter earners for your video production business, especially when you’re first starting out: Something that I always do is mic up the groom during the ceremony.
I use Lavalier microphone system like you see on live TV shows. You know those times when you’re watching a chat-show and catch a glimpse of a small black object peaking out from under someone’s collar? These are small clip-on mics that pick up quality sound. With the groom wearing a mic during the ceremony, I’m able to capture the bride and groom’s vows, as well as the vicar (or ceremony reader’s) voice.
As I’ve mentioned throughout, there are indeed many more options. Sound is a veritable ocean of confusion in the video production world, so I hope that’s a solid introduction for someone just getting set up. There are plenty more options for every budget and situation imaginable.
Once you master the above, I’d advise you start experimenting with different pieces of sound kit by hiring them first.
Here’s the Lowdown on Video Equipments
Don’t get wrapped up in needing to own every piece of video equipment you can get your hands on. You don’t need the latest shiny gadget to start a great and profitable video business. This isn’t about keeping up with the Joneses. It’s all about getting what we need and getting started.
Another important note on video equipments is that this is an ever-changing field. Not to mention fast changing. What is new today might be old school within a year or two.
Spending thousands of dollars on kit and then finding everything’s outdated in a couple of years and you have to go out and spend more money is not cool. As mentioned already, hiring can be a great solution for a lot of this stuff, especially specialist lenses that you might only need on certain projects.
As I said at the start, these are just the 6 Essential Pieces of Video Equipments To Start Your Video Production Business. We can talk about Canon L-glass, monopods and Carl Zeiss lenses another time. 🙂
Get the basics, hire the rest if needed, and then scale up from there as you start to make real money. Don’t blow your load right away – that money can be spent in better ways to grow your business, as we’ll cover in a bit.
Matt Crawford
Related posts
19 Comments
Leave a Reply Cancel reply
This site uses Akismet to reduce spam. Learn how your comment data is processed.





Wow, what a big read, but cool. That was cool. I feel like I have a better grasp on what gear to get now. I am a bit of a gear-head, did it with photography, did it with skiing and know probably do it with filmmaking things!
But I get your point about not being too reliant on gear!
What would you recommend for the battle between canon and nikon? Who wins and basically which is best?
Thanks for the comment, Patricia. Like I say in the article, being a gear-head is all well and good, provided you don’t get bogged down in the details and forget what your goals are! The skiing example is actually one of the big “buy all the gear asap” cliches! 😉
As far as Canon vs. Nikon, that’s an oft-asked question. For me, it’s Canon all the way, but your mileage, of course, may vary. Some people are Canon folks, others are Nikon and some, even, are Sony. And you can’t persuade them otherwise.
Do you have friends who have any of those camera brands? If you do, check those cameras out, hold them in your hands and put them through your paces. See what works for you. It’s a helluva lot cheaper than buying every brand out there!
Sharp breeakdown of what you need the basics for video production. You seem to really know your stuff. Keep it up man!
Thanks for commenting, Jameson.
See you around the site!
Great article! After reading your section on tripods I bit the bullet and bought one. 🙂
Next comes buying the microphones…
Keep your articles coming, please! 😀
Hi Katie,
What tripod did you go for in the end?
Thanks, Katie. Really appreciated you taking the time to comment!
Of course! 🙂
I bought the MT055xPro3 ManFrotto and the MVH502AH head. I’m super excited to use them!
Nice! Good luck, Katie!
thank u man, your article abput equiments have helped me too much. I was thinking that I will start when I will have 10k usd
Thanks for the comment, Pierre. That’s great that you’re making progress.
Don’t forget, though, that you can start before you have $10K. You can start whenever you want – you can even hire a camera and lenses, etc.
Good luck!
Cheers,
Matt
Matt, am just reading dis. Am planning to have my own video pro studio and you have highly motivated me to press on. Many thanks and God bless you. Anthony form Lagos nigeria
Hi Anthony,
That’s awesome! I’m pleased it motivated you!
Hi Matt! Great article. I´m already working as a freelance cinematographer. I have a new Manfrotto MT290XTA3US 290 Xtra and the MVH502AH head… I´m really really excited to use them both! Ilike your blog a lot because youy guidance on business and branding is great. Thank you very much!
Hi Juan,
That’s awesome! Thanks for the comment and glad you’ve found the articles helpful.
Anything you’d really like to see an article on?
Thanks for this guide Matt! I really appreciate how you keep it simple and stick with the basics, made it really easy to follow along. And seeing that old-school Steenbeck in action: wow! Super cool to see, but definitely makes me feel sympathetic for editors back in the day. Reminds me of Robert Rodriguez’s story about having to film over multiple VHS tapes to get his film just right!
Appreciate the comment, Dronile – thanks!
I am more than enlighten, thanks a lot Matt. I belief I can do all and give you positive feedback soon – a result of your self motivating effort boooom
Thanks, Emmanuel! That’s great to hear.
Best of luck with everything!
Thanks for the post, Introducing the latest and greatest from Tamron India – our Lens for E-Mount! Designed with precision and quality in mind, this lens is perfect for capturing stunning images on your E-mount camera. With superior sharpness and clarity, this lens will take your photography to the next level. Upgrade your gear and invest in Tamron’s Lens for E-Mount.
Visit here: https://tamron.in/