
Masking in Premiere Pro is a powerful tool that lets us manipulate and enhance our video projects with precision.
It’s like having a magic wand that can reveal or conceal parts of our footage, creating stunning visual effects or simply correcting imperfections.
We’ll walk you through the steps to master this essential skill, whether you’re looking to blur out a logo, create a text overlay, or craft a complex visual narrative.
Stick with us, and we’ll make sure you’re masking like a pro in no time.
How To Mask In Premiere Pro
What Is Masking In Premiere Pro?
Masking is a technique used to hide objects or effects by adding a fake background over them. It is useful for when you want to hide your subject from view and make it appear as if they are not in the shot.
Masking is a powerful tool in Premiere Pro that allows you to select an area of your image and apply effects only to those parts of the image.
This can be useful for isolating an object or person from its surroundings, or for applying effects such as blur or color correction to specific areas of an image.
Masking is available in all of Premiere Pro’s editing tools, including the Lumetri Color panel, the Effects panel, and the Mask tool.
What Is Masking In Premiere Pro?
When we jump into the world of video editing, masking in Premiere Pro brings a realm of creative control.
It grants us the power to isolate and manipulate specific elements within a frame.
With the use of masks, we’re able to draw attention where we want it.
Think of scenes in The Avengers where the focus shifts seamlessly from character to character, or consider how even in Inception certain elements move while others are perfectly still.
Unleashing the potential of masking – we tap into:
- The capacity to enhance or obscure aspects of a scene,
- The ability to apply effects to confined regions, opening a vast array of artistic possibilities,
- The flexibility to work non-destructively, ensuring our original footage remains untouched.
Masking is integral whether we’re crafting a cinematic masterpiece or a simple vlog.
A sharp mask can elevate a product reveal, spotlight an interview subject, or immerse viewers in a layered storytelling experience.

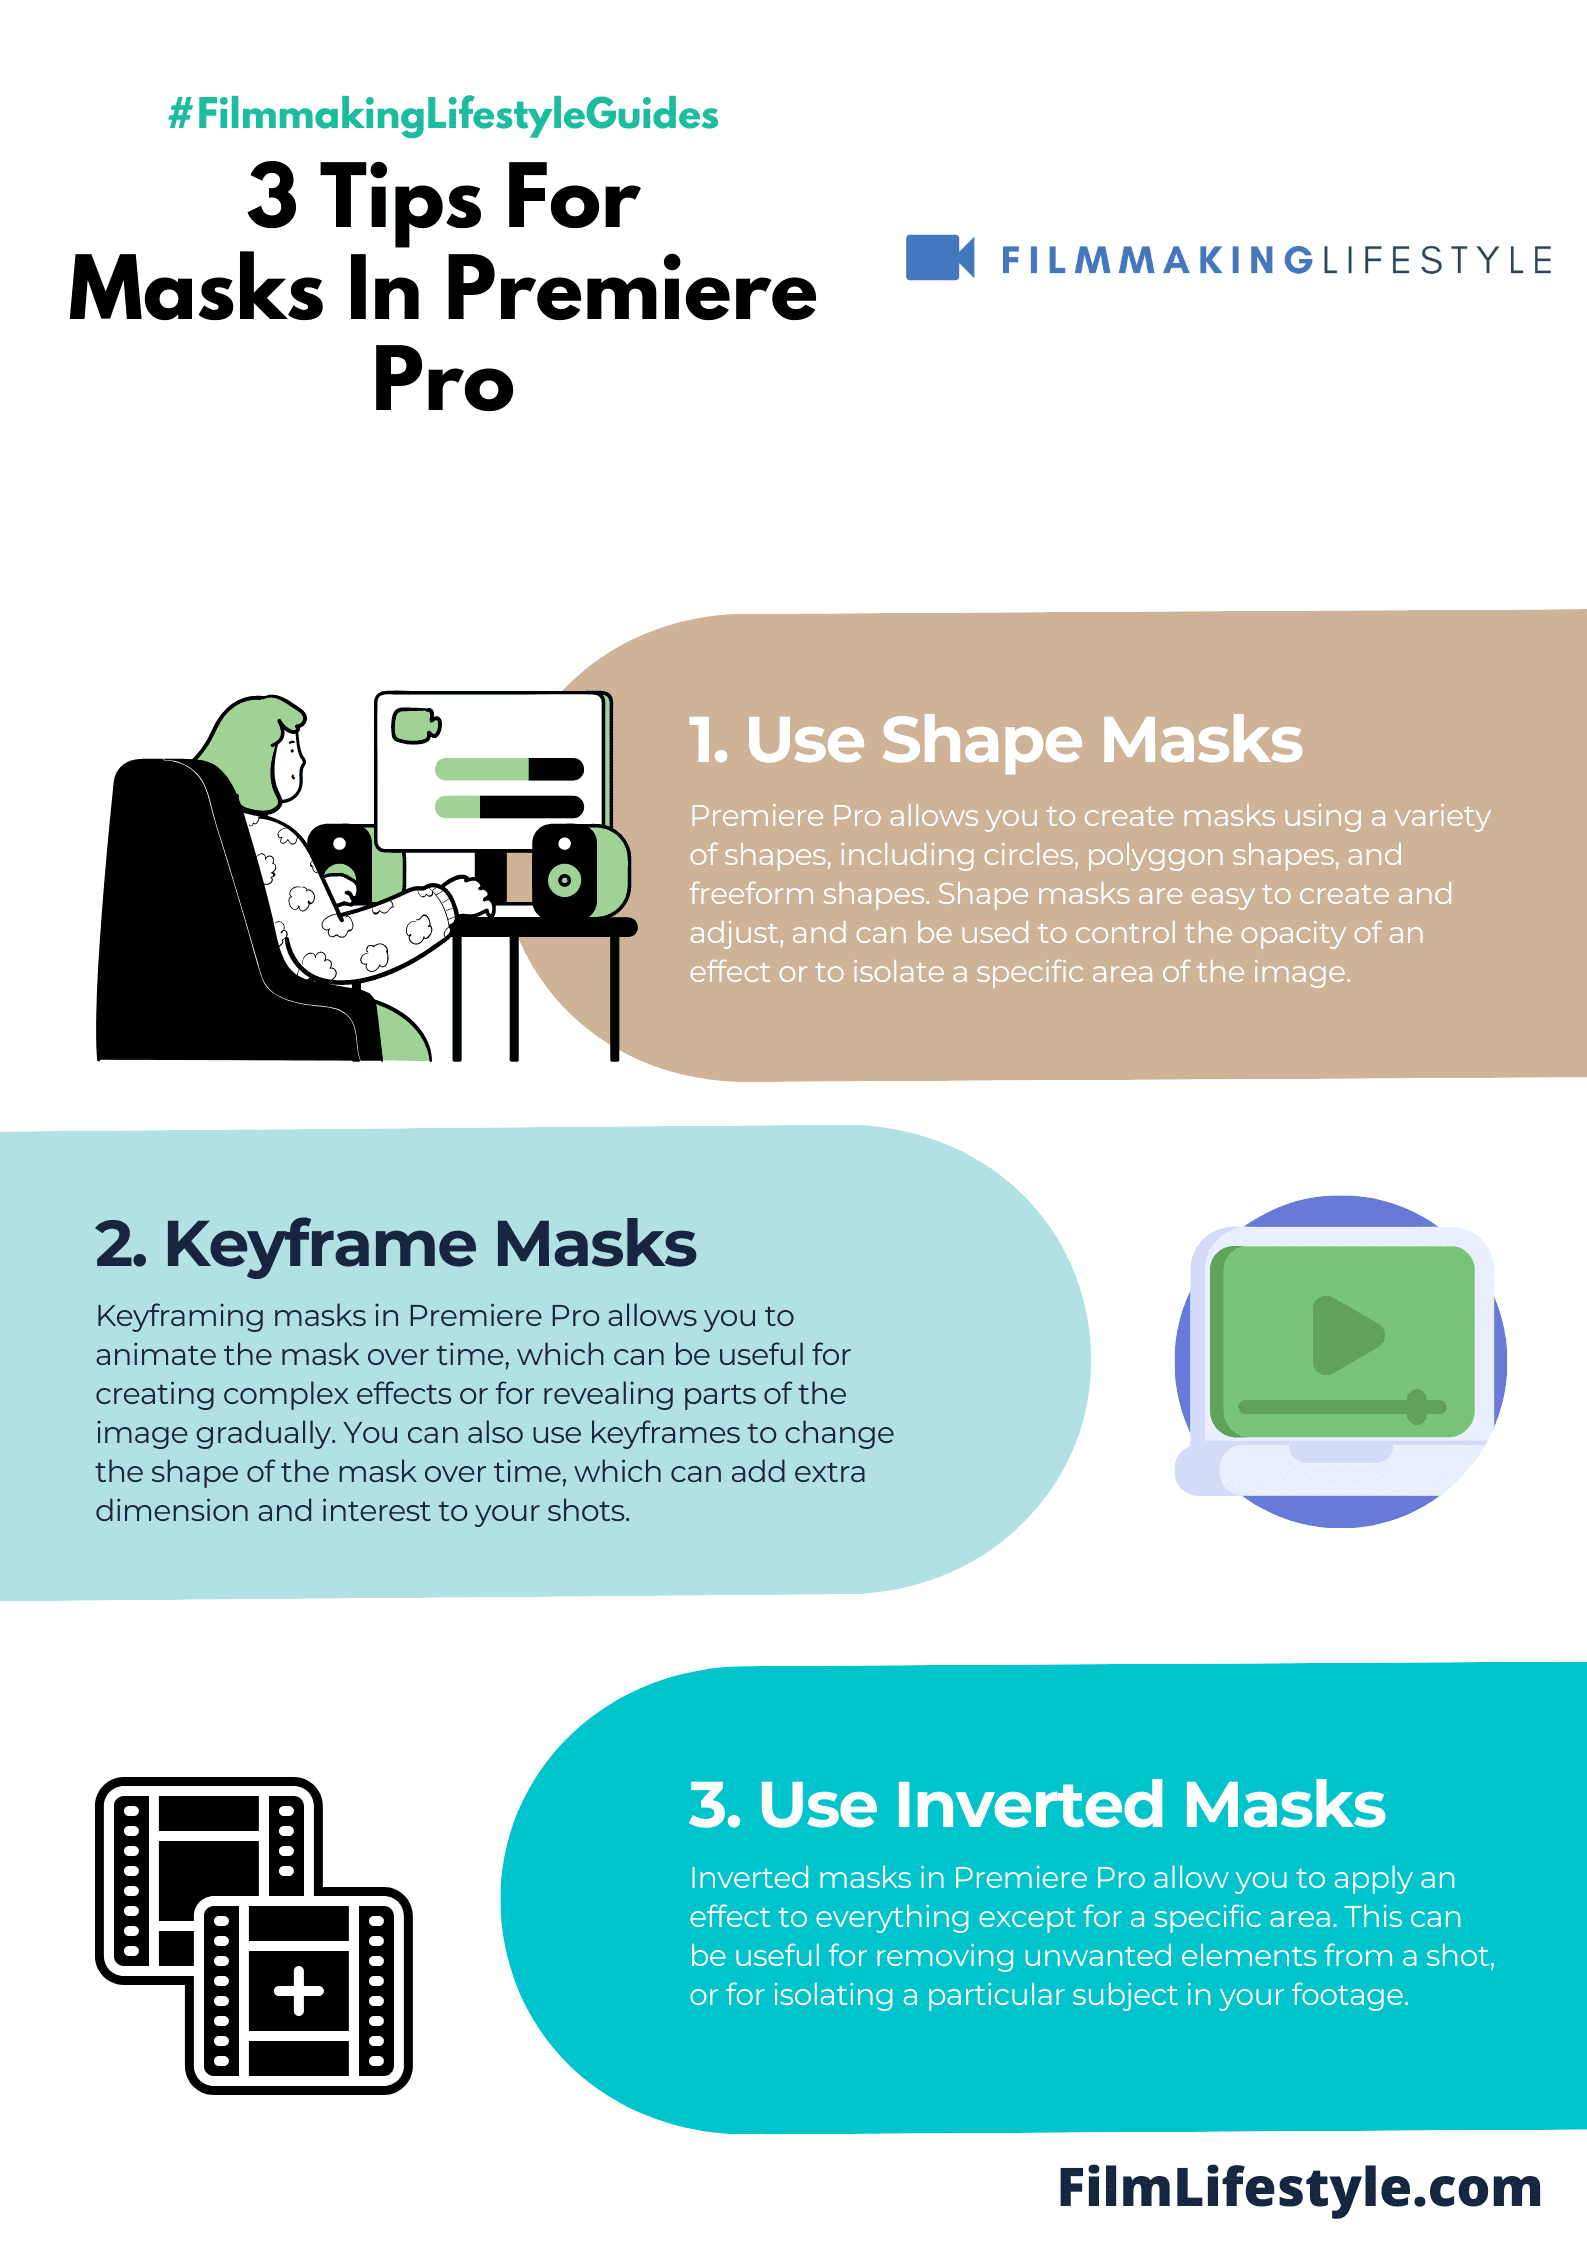
Premiere Pro gives us various types of masks to Use, each serving different creative needs.

The pen tool for creating custom shapes or the ellipse and rectangle tools for quick geometric masks help us tailor our edits to perfection.
It’s not just about hiding and revealing – it’s about precision.
A mask can act as a surgeon’s scalpel in our hands, bringing precision to color correction or refining a compositional element.
As we advance through this guide, we’ll show you how to wield masks effectively.
Whether it’s to blur out distractions or to introduce dynamic text overlays, we’re always one step ahead, ensuring that our videos leave a lasting impact on our audience.
Our continuous exploration of masking techniques underscores how it’s an indispensable feature in Premiere Pro.
Stay tuned as we jump deeper into these tools, ensuring our edits remain sharp, our stories compelling, and our visuals breathtaking.

Why Use Masking In Premiere Pro
Masking is a fundamental tool in our video editing arsenal.
It provides a way to finesse our footage, allowing us to highlight key components with precision.

This feature is particularly useful when dealing with scenes that require a touch of subtlety or when making nuanced adjustments without affecting the rest of the frame.
We often encounter scenarios where certain elements need to be corrected or removed.
Masking serves as an invaluable resource here – it lets us surgically alter just those segments, rather than applying blanket changes.
Imagine isolating a product in a commercial to boost its prominence or subtly tweaking the lighting on an actor’s face to convey the intended mood.
Here’s a few instances where masking in Premiere Pro saves the day:
- Correcting exposure issues on specific parts of the shot,
- Enhancing color grading for disparate elements within the frame,
- Creating a sense of depth by blurring background elements selectively.
Beyond corrections, masking paves the way for creative storytelling.
We’re able to construct scenes that otherwise would be impossible or impractical to capture on camera.
Through masking, we’ve seen worlds collide in films like Doctor Strange, where characters shift through multiple dimensions with the seamless integration of visual effects.
Our ability to direct the viewer’s focus wherever we desire is another advantage of using masks.
We control the narrative by guiding the audience’s eyes – be it to a subtle foreshadowing detail or away from an inadvertent production error that made its way into the final shot.
In Jurassic Park, masks were crucial for compositing the lifelike dinosaurs into the live-action footage, creating a believable interaction between the characters and their prehistoric counterparts.
By leveraging the masking tools in Premiere Pro, we equip ourselves with the means to not only refine our work but also to expand our creative boundaries.
The capability to adapt and enhance footage in post-production opens up endless avenues for visual experimentation and storytelling triumphs.
![Masking (Part 1) - Adobe Premiere Pro CC Class 14 - Urdu / Hindi [Eng Sub]](https://filmlifestyle.com/wp-content/plugins/wp-youtube-lyte/lyteCache.php?origThumbUrl=https%3A%2F%2Fi.ytimg.com%2Fvi%2FxCmLqMvveG4%2F0.jpg)
Tools And Techniques For Masking In Premiere Pro
When tackling a complex scene in Premiere Pro, efficient use of masking tools and techniques is essential.

Whether we’re highlighting a character in The Dark Knight or drawing focus to a product, these tools help bring our creative vision to life.
The Pen Tool stands as a cornerstone for precise masking.
It allows us to plot points around the subject, creating paths that can be adjusted to any shape or size.
By manipulating the bezier handles, we can refine the path to snugly fit complex outlines.
Understanding the Power of Keyframes in masking cannot be overstated.
Coupled with the Pen Tool, it lets us animate masks frame by frame, making sure that our subject remains the focal point even as it moves across the screen.
The Essential Graphics Panel further expands our masking capabilities with responsive design features.
This allows elements to maintain their position relative to the mask, creating a more dynamic interaction between graphics and footage.
Several techniques streamline the masking process:
- Use the Track Mask feature to follow elements automatically,
- Leverage the Invert Mask function to switch between revealing and hiding areas,
- Apply mask feathering to blend the mask edge seamlessly with the background.
For color correction or exposure adjustment in specific areas, we often employ masks within the Lumetri Color panel.
This focused approach means we can alter the mood of a scene without affecting the entire image.
Adjustment layers are a non-destructive way to apply effects to multiple clips at once.
By masking an adjustment layer rather than the individual clips, we can save time and maintain flexibility in our project.
finally, blending modes within masks can create unique visual stylings.
We can experiment with these modes to achieve effects like light leaks, reflections, or even ghostly apparitions.
Each blending mode interacts with the underlying footage in a distinct way, offering us a spectrum of creative options.

Step-by-step Guide To Masking In Premiere Pro
Creating a mask in Premiere Pro is a fundamental skill for filmmakers looking to enhance their visual storytelling.
Let’s break it down into simple, actionable steps.
First, import your footage into Premiere Pro’s timeline.
Ensure it’s the clip you want to apply the mask to.
With the clip selected, go to the “Effects Control” panel.
Here, you’ll find options under the opacity setting—click on the “Create Ellipse Mask” or “Create 4-Point Polygon Mask” icon, depending on the shape you need.
Adjust your mask by moving the points to match your desired area.
You can also fine-tune the mask by dragging the handles to change its curvature.

This is crucial for fitting the mask precisely around your subject.
To animate your mask, turn on keyframing for the mask path.
Move the playhead to the starting frame and set a keyframe.
Then, advance to where you want the mask to move and adjust the mask path.
Premiere Pro will auto-generate keyframes for these changes, creating a smooth transition over time.
Consider these advanced tips for more complex masks:
- Use the “Pen Tool” for custom shapes, perfect for intricate subjects or irregular areas.
- Feather the mask edges for a softer, more integrated look, allowing the effect to blend seamlessly with the rest of the scene.
- If necessary, invert the mask to switch the affected area, which can be useful for revealing or hiding specific elements.
By following these steps, you’re well on your way to mastering the art of masking in Premiere Pro.
With practice, these techniques can dramatically transform your visual narrative and elevate the production value of your projects.
Remember, fine adjustments can make a huge difference, so take the time to refine your masks and create that perfect effect.

Advanced Masking Techniques In Premiere Pro
Once we’ve mastered the basics of masking in Premiere Pro, we can move on to more sophisticated methods.
Let’s jump into techniques that can take our visual storytelling to the next level.
Fine-tuning masks requires patience and attention to detail.
Luckily, Adobe Premiere Pro offers a range of advanced options to make this process as smooth as possible.
By using the Track Mask feature, we can engage in dynamic scene changes and object movements without constant adjustments.
The Essential Graphics Panel plays a crucial role in advanced masking.
This feature allows us to enhance text and graphics integration with our video content seamlessly.
Here’s how we can exploit this powerful tool:
- Create or import graphics in the Essential Graphics Panel,
- Apply masks directly to text and shape layers for a cleaner look.
Adjustments to the mask’s properties should be handled delicately for a natural outcome.
Mask Expansion and Mask Feather are two properties that require subtle manipulation to avoid an artificial mask edge which can distract from the immersive experience.
For scenes demanding intricate adjustments, using the Bezier Curves with the Pen Tool is indispensable.
This provides us with the precision needed to tackle complicated forms and angles, ensuring every mask sits perfectly within our narrative.
Sometimes a scene requires a mask that reveals rather than conceals; in such instances, Inverting Masks is our go-to method.
This simple yet effective flip can wholly alter the focus and mood of a segment.
We shouldn’t underestimate the power of Blend Modes when we’re masking.

These are especially useful when we’re looking to create layered visual effects or to integrate various elements more organically into scenes.
Experimenting with advanced masking techniques in Adobe Premiere Pro pushes our creative boundaries.
Whether it’s through refining motion tracking or leveraging blend modes, we’re constantly discovering new ways to captivate our audience with our film and video projects.

How To Mask In Premiere Pro – Wrap Up
We’ve journeyed through the intricacies of masking in Premiere Pro, and now it’s up to us to apply these techniques to our projects.
Let’s not shy away from experimenting with Track Masks, the Essential Graphics Panel, and Blend Modes to enhance our visual storytelling.
Remember, it’s the subtle tweaks to Mask Expansion and Feather that make our work stand out.
With the right approach, we’ll turn ordinary footage into captivating visual narratives.
It’s time to get creative and let our imagination lead the way in Premiere Pro.
Let’s make our next project our best yet!

Frequently Asked Questions
What Is Track Mask In Premiere Pro?
Track Mask is a feature in Premiere Pro used to dynamically adjust masks to follow objects or scenes as they move over time, thus maintaining the effect on the intended target amidst change.
Can The Essential Graphics Panel Enhance Text And Graphics?
Yes, the Essential Graphics Panel in Premiere Pro allows users to integrate and enhance text and graphics within their video projects more seamlessly.
How Can I Avoid Artificial Edges In Masks?
To avoid artificial edges in masks, you can delicately adjust properties such as Mask Expansion and Mask Feather.
This creates a more natural transition at the mask’s edges.
What Is The Advantage Of Using Bezier Curves With The Pen Tool?
The use of Bezier Curves with the Pen Tool in Premiere Pro allows for precise adjustments when creating masks, especially in scenes that require intricate masking work.
What Does Inverting A Mask Do?
Inverting a mask in Premiere Pro reverses the masked area, revealing the parts of the video that were originally hidden by the mask and concealing the previously visible areas.
How Do Blend Modes Affect Masking?
Blend Modes can be used in conjunction with masking to create complex layered visual effects, adding depth and interest to your video compositions.
They determine how the masked layer interacts with the layers beneath it.
