Most beginning filmmakers all have variations of the same question; ‘How do I make my films look more professional? More, cinematic?’ For generations, filmmakers have asked: How do I get that film look?
That’s a good question. After all, nothing’s more discouraging than putting your heart and soul into a project only for it to come out looking like someone’s dad making home movies.
So how do you get that cinematic look on any camera, with any budget?
Getting The Film Look – How Is It Done?
Look no further. These 19 tips will have your films looking less home movie and more, well… movie.
This guide is designed for beginners who are just getting started making their own films, but aren’t sure how to capture beautiful, cinematic images that rival the quality they see in professional work.
1. Color Grade
The single biggest difference between professional looking visuals and amateurish looking video, is color grading. Hands down. Stop the presses.
Now, that’s not to say that all the other elements of your film aren’t important. They are. It’s just to illustrate just how much of a difference color grading can make.
Color grading and color correction are essentially when you correct and stylize the colors of your shots in post.
One essential tip for color grading is to shoot RAW. RAW is just an uncompressed file format that stores all the data captured by your sensor allowing you to produce higher quality images.
Shooting in RAW is typically as simple as changing a setting on your camera.
The other benefit of this, other than higher quality images, is that your shots will have the least amount of baked in information possible. This will allow you to have more freedom to color grade them in post.
LUTs can be extremely helpful when color grading your own footage. Applying them to your clips can help you quickly get to a great starting point so you can just tweak your footage from there.
If you want some great free LUTs for easy color grading, you can’t go wrong with these 7 free LUTs from Lutify.me and 9 free LUTs by FILM CRUX.
2. Composition
Essentially, composition is what’s in the frame of your shot, as well as how the elements within your shot are arranged.
There’s endless theory on what makes for good composition, and which particular arrangements work best for which circumstances, but here are a few quick and dirty composition tips to get you started.
The Rule Of Thirds
You’ve probably heard of this before. Divide your frame into thirds horizontally and vertically, then place points of interest where these dividing lines intersect. Position important elements like the horizon along the lines themselves.
Lead Room
If a character is looking frame right, then typically, they should be placed frame left. This makes the shot more comfortable for the viewer by creating open space in front of the character called lead room or lead space.
[Tip] Lead Lines – Use natural lines in your scene to lead the viewer’s eye into your image. These can be anything from depth lines in one or two-point perspective, to other items or elements within the shot that lead toward the subject or a point of interest.
Straighten Horizon Lines
One good tip is to straighten any horizon lines that cross the length of your shot. It’s best to do this while shooting, although it can be done in post if need be.
Keep in mind, you don’t have to follow any of these. Think of them less as rules, and more as guidelines. When you don’t know what you’re doing, these are a great place to start.
But, if you want to think of them as rules, remember, rules can be broken. The best advice though would be to learn the rules first, and then break them.
3. Letterbox
If you’ve ever seen a Wes Anderson or Quentin Tarantino film, you’ve definitely seen letterboxing before.
Letterboxing is the practice of transferring a film shot in a widescreen aspect ratio to a standard aspect ratio. This creates two black bars or mattes at the top and bottom of the image that many people associate with a cinematic look.
Now, you probably have no need to take a 16:9 film and make it fit a 4:3 tube TV, and you’re probably not shooting on an 70mm like Tarantino did for The Hateful Eight, but if you like this style, you can emulate it pretty easily using one of the two methods below.
Export Settings
A great way to get a letterbox is to export your film in the aspect ratio you want. If you want your film displayed as 2:40:1, just make the composition in your NLE those settings, and then export your finished film the same way.
Depending on where your film will be displayed, letterboxes will be added automatically based on your viewer.
Letterbox Templates
Another great way to add letterboxes to your film is to just use letterbox templates. These are essentially letterbox images (black bars) you can just drag and drop on top of your footage. Easy. These great free letterboxes are based off of iconic films like The Revenant and The Hateful Eight.
Now keep in mind, which method you use should be based off of what your project is. Ninety-nine times out of a hundred, no one is going to notice or care which method you use, but in some circumstances, where your film is being screened will have an impact on how it’s displayed.
4. Shallow Depth Of Field
Having a shallow depth of field is when your subject is in focus, and the foreground and background of your shot are out of focus. This creates bokeh, the aesthetic quality of the blur in the out-of-focus areas of your shot.
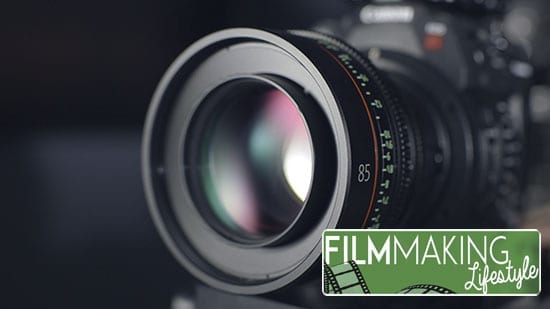
To get a shallow depth of field, you want to use a lens with a low f-stop. The lower the f-stop, the less area will be in focus. Anything lower than f2.8 will give you decent bokeh, but f1.8 or lower will really look amazing.
Keep in mind, the lower the f-stop, the harder it will be to keep your subject in focus. Practice with a higher f-stop, and then work your way down over time as you get better.
Prime lenses are perfect for this. Prime lenses let in more light than zoom lenses, are typically better for shooting in low light, and have lots of other benefits to filmmakers.
A 50mm f1.8 prime lens, or nifty fifty, is perfect for shooting with a shallow depth of field, and should probably be the first lens in any new filmmaker’s arsenal. Plus, it’s cheap.
Another thing to keep in mind is that you probably don’t want a shallow depth of field all the time. For example, in wide shots or things like aerials or landscape shots, you probably want to have everything in focus, so in those circumstances it’s generally better to shoot at a higher f-stop.
Yet another great benefit of shooting with a shallow depth of field is that it can help hide shooting locations that are less than optimal. If the background is blurred out, people will be less likely to notice it’s your grandmother’s basement.
5. Slow Tracking
A tracking shot is any shot where the camera moves forward, backward, or alongside the subject. Think of the camera as being on rails, which is often done to achieve tracking shots in film.
Slow, perfectly smooth tracking shots are typically associated with a cinematic look. They can help you to easily build tension, give the viewer a sense of wonder, or awe, and can create a ton of visual interest.
You don’t need a dolly, rails, a slider or a gimbal to get these. You can go handheld, but if you do, you will almost definitely want to use…
6. Warp Stabilization
Warp stabilization is an effect that helps smooth out shaky footage in post. If you use Adobe Premiere or
Don’t rely on warp stabilizer. It’s almost always best to get the shot you want in camera, but when you’re short on equipment, money and time, that’s not always possible.
7. Gimbals
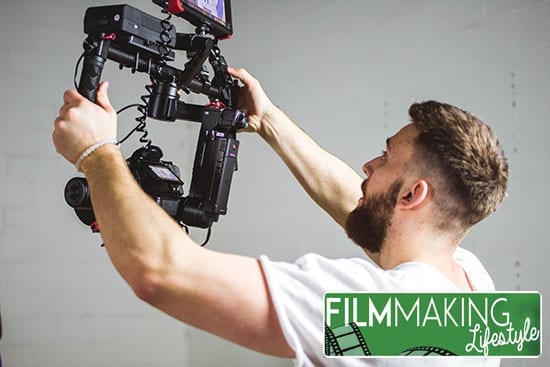
If you have the money for a gimbal, it’s a great investment. A gimbal is basically a handheld or mounted camera stabilizer designed to help you get effortlessly smooth, cinematic shots.
The difference between a shaky handheld shot and a smooth, stabilized shot is night and day, and can add many layers of production value to your work.
In fact, other than a camera, lenses and a tripod, a gimbal might be the single best money you can spend on camera equipment.
8. Aerials
Never before in history have aerial shots been accessible to indie filmmakers. Just a decade ago, you literally used to have to rent a helicopter to get aerial shots.
Times have changed.
Now, almost any commercially available drone can help you get breathtaking aerial shots for your films.
Aerials are perfect for establishing shots. When your subject goes to a new city or location, a nice aerial can help set the tone and the vibe of the scenes to come while showing off this new environment.
Almost every blockbuster film uses these to establish new locales, but aerials are also perfect for travel films, nature documentaries, and of course, action sports.
9. Slow Motion
Everything looks better in slow motion. Shoutout to Dave Chappelle.
The only problem with slow motion is that it’s easy to get carried away. Because even the most mundane actions look incredible in slow motion, it becomes compelling to start shooting everything that way to the point where what you’re shooting no longer serves the story.
Remember, story first.
If you want to shoot in slow motion, you just need to shoot in a higher frame rate. Most films are shot in 24fps which we typically associate with that film look.
For slow motion, just shoot in something like 60fps, and then convert it down to 24fps in post. This will make your footage play back in a little less than half speed. The higher the frame rate, the slower it will be when played back at 24fps.
10. Manage Highlights
Blown out highlights are a great tragedy that befall many a fledgling filmmaker. It’s essentially when the bright parts of your scene lose all detail until they become complete white.
This happens a lot with cheap cameras or when you’re shooting bright scenes without exposing properly or using UV filters. Doing these two things right though will make blown out highlights a thing of the past.
Proper Exposure
You should always try to expose your shots properly, even when blown out highlights aren’t an issue. Exposure is all about balancing your frame rate (typically 24fps if you’re shooting for a film look), your shutter speed (usually about double your frame rate; 1/50 if you’re shooting 24fps) your ISO, and your lighting.
This video will break it down for you so you never have to be in the dark again. Boom… punned.
UV Filters
UV filters will save your life. Not really. But they will help you from getting blown out highlights in your shots.
A UV filter is basically a little lens lens (so to speak) that screws onto the end of your camera lens to even out the lighting in your shot.
In a way, it pulls down the highlights to be closer to the darker areas in your shots by filtering out some of the light that makes it through to your camera’s sensor.
11. Sweeping Shots
When you think of epic, most people imagine vast, sweeping shots. The camera rolling over the precipice of a massive waterfall as a flock of cranes glide over the canopies below.
Or whatever.
These types of shots will add even more production value to your films. Again, drones are perfect for these. They can show off the scope and scale of a particular environment in a way that’s difficult to do shooting from the ground.
When you’re getting sweeping shots, just be careful not to move the camera too fast. The viewer has to be able to clearly see what’s happening in order for these shots to have the desired effect.
12. Film Grain
Another surprising way to make your film look more cinematic is to add film grain.
Film grain is just the grain or granularity naturally created when shooting with processed film.
Digital cameras obviously don’t have film grain, so if you want to get the look, the best option is to get film grain overlays.
Cinetic Studios has a few for free, but if you really want to get saucy, holygrain makes some beautiful ones that will definitely give your films a textured, aesthetic quality.
13. Lighting
Lighting is, well… lighting. I’m not going to lie to you. Lighting is boring… but it’s important.
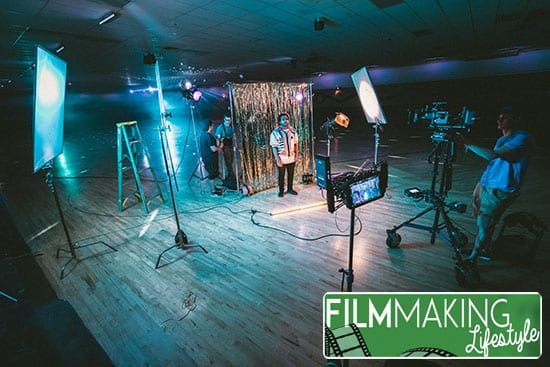
You’d be surprised how much lighting can affect the look and style of a shot. The same scene can be lit ten different ways, each one having a dramatic impact on the mood, feel, look and vibe of the finished product.
You can shoot with available lighting, like Emmanuel Lubezki in The Revenant, or you can shoot with stylized lighting like Nicolas Winding Refn in… well, everything Nicolas Winding Refn does.
14. Lens Flares
Like film grain, lens flares were a phenomenon created by shooting with flawed equipment that has now become a visual aesthetic many filmmakers now intentionally emulate in their work.
A lens flare is just a visual artifact created by light bouncing around inside a camera lens to create a “flare” on the film or video being recorded.
You can still create lens flares in most modern lenses by shining or reflecting lights into the camera or shooting into a bright light source like the sun (be sure to use UV protection so you don’t damage your sensor).
Most lenses that are manufactured nowadays though are designed to prevent unnecessary flaring, so if you really want to get the look, either get an older lens, or use digital lens flares or overlays.
Video Copilot sells an amazing plugin for Adobe After Effects called Optical Flares which have even been used in films by the lens flare king himself, J.J. Abrams.
15. Anamorphic
Speaking of J.J. Abrams, if you’ve seen any of his films, you’ll notice that they tend to have a particular style to them. Super 8 and the Star Trek films most notably have a distinguished anamorphic look which stylistically pays homage to Steven Spielberg’s films of the 80s.
The anamorphic look is typically associated with long, horizontal lens flares, chromatic aberration and vignetting around the outside of the image, and a distortion in which the edges of the frame seem more compressed.
This makes straight lines in a shot appear to curve beautifully as they reach the outside edges of the frame.
And they look cool.
If you want to get a similar anamorphic inspired look, but you can’t afford to shoot with anamorphic lenses, you can emulate the look in post. This tutorial breaks down the different elements and how to create them.
16. Noise Reduction
Noise is the bane of the indie filmmaker’s existence. It’s that messy grainy stuff that typically shows up in the darker areas of your shot, and is usually created when not enough light is reaching your camera’s sensor.
If you have great lighting and you expose your shots properly, or your camera does really well in low lighting situations like the Sony a7s II, it probably won’t be much of a problem.
But that’s not always the case.
If you do need to remove noise in your shots, you can do it to one degree or another with a plugin like Neat Video. Neat Video is a noise reduction plugin that’s available for just about every NLE you can imagine, and it works pretty well.
It’s not perfect though, and the noise reduction does come at a cost. It can distort the details of your footage and make for a less appealing image in some ways, but there’s times in which that’s a price worth paying to remove unwanted noise.
17. Sliders / Dollies
While gimbals are the new king of camera movement, and drones rule the skies, sliders and dollies still have their place.
A slider is basically a contraption that allows your camera to “slide” across it either manually or automatically.
A dolly is basically anything your camera sits on that rolls.
Both are great. Both range in price anywhere from ‘dirt cheap’ to ‘why are you buying that’? Both can help you get beautiful, cinematic shots.
18. Transitions
A transition is any time one shot goes into another. This can be as simple as a basic cut, to something as complicated as this entire video:
Stylized transitions are perfect for travel filmmakers in which the entire concept is typically about showing off locations in new or spectacular ways, but they’re used in every facet of filmmaking and can help instantly raise the perceived production value of your work.
In-camera transitions are when you shoot to create a transition effect in camera.
You can also download transitions you can use in post that already made for you.
Be very careful. Overuse can be extremely detrimental to a film, so here are a few good guidelines to follow.
Story First
In general, you always want to focus on telling the best story and making everything you do accentuate and work for that goal.
Don’t Overuse
It can be tempting to pack as many transitions as you can into your project. Be careful not to overuse or abuse them, lest their impact be lessened as well.
Stay Consistent
If one shot is going from left to right, the next would probably look best going from left to right, and the transition as well. Use your transitions to guide the viewer’s gaze and add visual interest without ruining the aesthetic appeal.
19. Simulated Camera Movement
Sometimes you just don’t have a gimbal, sliders or dollies, especially when you’re just starting out. One great trick to add some dynamicity to an otherwise boring tripod shot is to add simulated camera movement in post.
The trick here is to be subtle. Extreme camera movements on tripod shots in post tend to look fake because the different elements in the shot aren’t parallaxing properly (crossing in front of or behind one another) as they would with real camera movement.
Zooms or tracking in and out shots can be done by simply keyframing the scale of your shot in your NLE. For instance, if the scale at the beginning of your shot is at ‘100’, set a keyframe.
Then go to the end of your shot and change the scale to ‘102’, which should automatically set another keyframe. Once you play it back, it should give the illusion that the camera is slowly tracking or zooming in.
Panning or tilting shots can be done by keyframing the position of your shot in the same way. Just increase the scale of your shot as well so that it doesn’t get cut off on the sides, top or bottom as it moves.
Getting The Film Look – In Conclusion
The best filmmakers not only have a great vision in their heads, they’re able to get the best representation of that vision onto the screen for others to see.
Hopefully this post will help you do that.
Bookmark this, reference it often, and If you know someone who’s getting started in filmmaking, hopefully this article can help them too.
Matt Crawford
Related posts
10 Comments
Leave a Reply Cancel reply
This site uses Akismet to reduce spam. Learn how your comment data is processed.



going to use some of these tips, thanks
Good luck, Michael73.
Helpful, thanks
Appreciate the comment, Joe.
This is a great article! I’ve been trying to learn more about cinematography and this article has given me some great tips.
Thanks, Mitchell.
This is a great article! I’ve been trying to learn more about cinematography and this article has given me some great tips.
Thanks, Greg.
Thanks for the informations!
Thanks, Islam.